本帖最后由 kylinpoet 于 2025-5-6 14:04 编辑
一、项目缘起:
ESP32 S3 + CAM 实在是低成本、高效的安防搭档。本项目通过在esp32上搭建http视频流服务,利用上位机实时获取摄像头的传递数据,进行识别。相应的数据处理在上位机完成。包括使用yolov5的预训练80分类数据进行人体识别,以及通过消息平台进行报警。
二、操作步骤:
1. 视频图传
在 dfrobot 的wiki库里找到并刷入,视频图传演示代码(点击访问),需要注意的是使用 Arduino 1.8版本刷入才行,Arduino 2 会输入失败(留待大佬解决)
- #include "esp_camera.h"
- #include <WiFi.h>
-
- //
- // WARNING!!! PSRAM IC required for UXGA resolution and high JPEG quality
- // Ensure ESP32 Wrover Module or other board with PSRAM is selected
- // Partial images will be transmitted if image exceeds buffer size
- //
- // You must select partition scheme from the board menu that has at least 3MB APP space.
- // Face Recognition is DISABLED for ESP32 and ESP32-S2, because it takes up from 15
- // seconds to process single frame. Face Detection is ENABLED if PSRAM is enabled as well
-
- #define PWDN_GPIO_NUM -1
- #define RESET_GPIO_NUM -1
- #define XCLK_GPIO_NUM 5
- #define Y9_GPIO_NUM 4
- #define Y8_GPIO_NUM 6
- #define Y7_GPIO_NUM 7
- #define Y6_GPIO_NUM 14
- #define Y5_GPIO_NUM 17
- #define Y4_GPIO_NUM 21
- #define Y3_GPIO_NUM 18
- #define Y2_GPIO_NUM 16
- #define VSYNC_GPIO_NUM 1
- #define HREF_GPIO_NUM 2
- #define PCLK_GPIO_NUM 15
- #define SIOD_GPIO_NUM 8
- #define SIOC_GPIO_NUM 9
-
- // ===========================
- // Enter your WiFi credentials
- // ===========================
- const char *ssid = "**********";
- const char *password = "**********";
-
- void startCameraServer();
- void setupLedFlash(int pin);
-
- void setup() {
- Serial.begin(115200);
- Serial.setDebugOutput(true);
- Serial.println();
-
- camera_config_t config;
- config.ledc_channel = LEDC_CHANNEL_0;
- config.ledc_timer = LEDC_TIMER_0;
- config.pin_d0 = Y2_GPIO_NUM;
- config.pin_d1 = Y3_GPIO_NUM;
- config.pin_d2 = Y4_GPIO_NUM;
- config.pin_d3 = Y5_GPIO_NUM;
- config.pin_d4 = Y6_GPIO_NUM;
- config.pin_d5 = Y7_GPIO_NUM;
- config.pin_d6 = Y8_GPIO_NUM;
- config.pin_d7 = Y9_GPIO_NUM;
- config.pin_xclk = XCLK_GPIO_NUM;
- config.pin_pclk = PCLK_GPIO_NUM;
- config.pin_vsync = VSYNC_GPIO_NUM;
- config.pin_href = HREF_GPIO_NUM;
- config.pin_sccb_sda = SIOD_GPIO_NUM;
- config.pin_sccb_scl = SIOC_GPIO_NUM;
- config.pin_pwdn = PWDN_GPIO_NUM;
- config.pin_reset = RESET_GPIO_NUM;
- config.xclk_freq_hz = 20000000;
- config.frame_size = FRAMESIZE_UXGA;
- config.pixel_format = PIXFORMAT_JPEG; // for streaming
- //config.pixel_format = PIXFORMAT_RGB565; // for face detection/recognition
- config.grab_mode = CAMERA_GRAB_WHEN_EMPTY;
- config.fb_location = CAMERA_FB_IN_PSRAM;
- config.jpeg_quality = 12;
- config.fb_count = 1;
-
- // if PSRAM IC present, init with UXGA resolution and higher JPEG quality
- // for larger pre-allocated frame buffer.
- if (config.pixel_format == PIXFORMAT_JPEG) {
- if (psramFound()) {
- config.jpeg_quality = 10;
- config.fb_count = 2;
- config.grab_mode = CAMERA_GRAB_LATEST;
- } else {
- // Limit the frame size when PSRAM is not available
- config.frame_size = FRAMESIZE_SVGA;
- config.fb_location = CAMERA_FB_IN_DRAM;
- }
- } else {
- // Best option for face detection/recognition
- config.frame_size = FRAMESIZE_240X240;
- #if CONFIG_IDF_TARGET_ESP32S3
- config.fb_count = 2;
- #endif
- }
-
- #if defined(CAMERA_MODEL_ESP_EYE)
- pinMode(13, INPUT_PULLUP);
- pinMode(14, INPUT_PULLUP);
- #endif
-
- // camera init
- esp_err_t err = esp_camera_init(&config);
- if (err != ESP_OK) {
- Serial.printf("Camera init failed with error 0x%x", err);
- return;
- }
-
- sensor_t *s = esp_camera_sensor_get();
- // initial sensors are flipped vertically and colors are a bit saturated
- if (s->id.PID == OV3660_PID) {
- s->set_vflip(s, 1); // flip it back
- s->set_brightness(s, 1); // up the brightness just a bit
- s->set_saturation(s, -2); // lower the saturation
- }
- // drop down frame size for higher initial frame rate
- if (config.pixel_format == PIXFORMAT_JPEG) {
- s->set_framesize(s, FRAMESIZE_QVGA);
- }
-
- #if defined(CAMERA_MODEL_M5STACK_WIDE) || defined(CAMERA_MODEL_M5STACK_ESP32CAM)
- s->set_vflip(s, 1);
- s->set_hmirror(s, 1);
- #endif
-
- #if defined(CAMERA_MODEL_ESP32S3_EYE)
- s->set_vflip(s, 1);
- #endif
-
- // Setup LED FLash if LED pin is defined in camera_pins.h
- #if defined(LED_GPIO_NUM)
- setupLedFlash(LED_GPIO_NUM);
- #endif
-
- WiFi.begin(ssid, password);
- WiFi.setSleep(false);
-
- Serial.print("WiFi connecting");
- while (WiFi.status() != WL_CONNECTED) {
- delay(500);
- Serial.print(".");
- }
- Serial.println("");
- Serial.println("WiFi connected");
-
- startCameraServer();
-
- Serial.print("Camera Ready! Use 'http://");
- Serial.print(WiFi.localIP());
- Serial.println("' to connect");
- }
-
- void loop() {
- // Do nothing. Everything is done in another task by the web server
- delay(10000);
- }
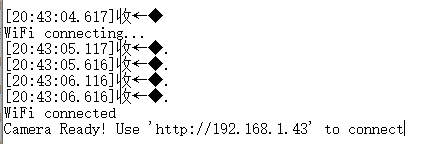
刷入成功后,我们会在串口中看到wifi连接信息。访问相应地址后,我们会看到以下内容。
 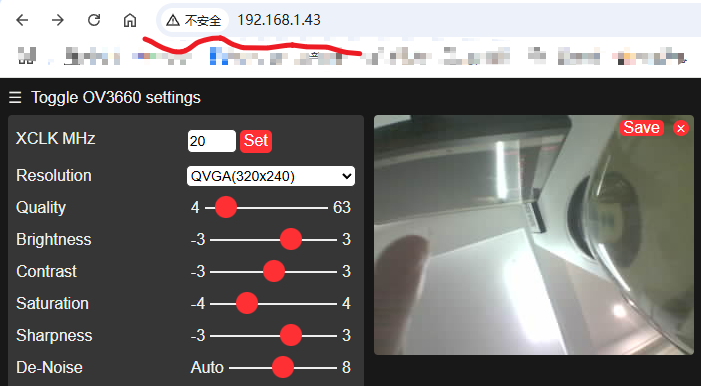
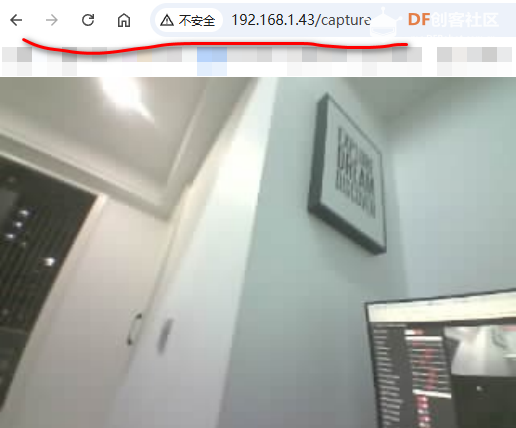
这里要注意下,网址首页打开是视频流的形式,访问 /capture 子页面,是抓取的实时图片。
我们在上位机上用的就是这个子页面。

2. 基于电脑yoloV5实现
yoloV5的代码,我们主要参考这里的文档(点击访问),但要做一些改变:
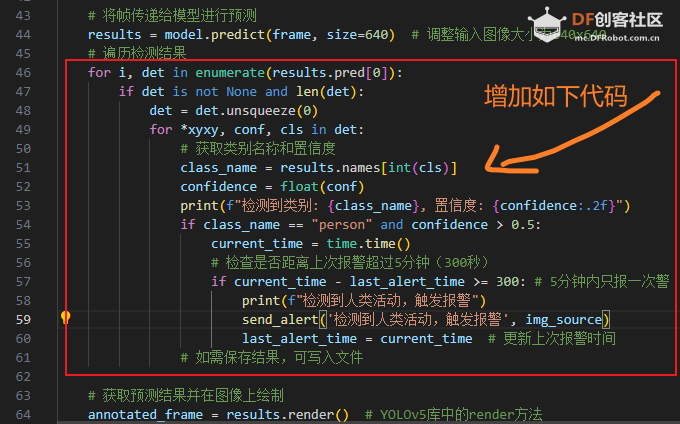
这里主要是判断是否检测到人类,以及为了正确阈值,设置的置信度。
另外还要增加发送消息预警的函数,这里是使用免费微信消息推送服务:server酱,当然你可以使用其它类似服务:
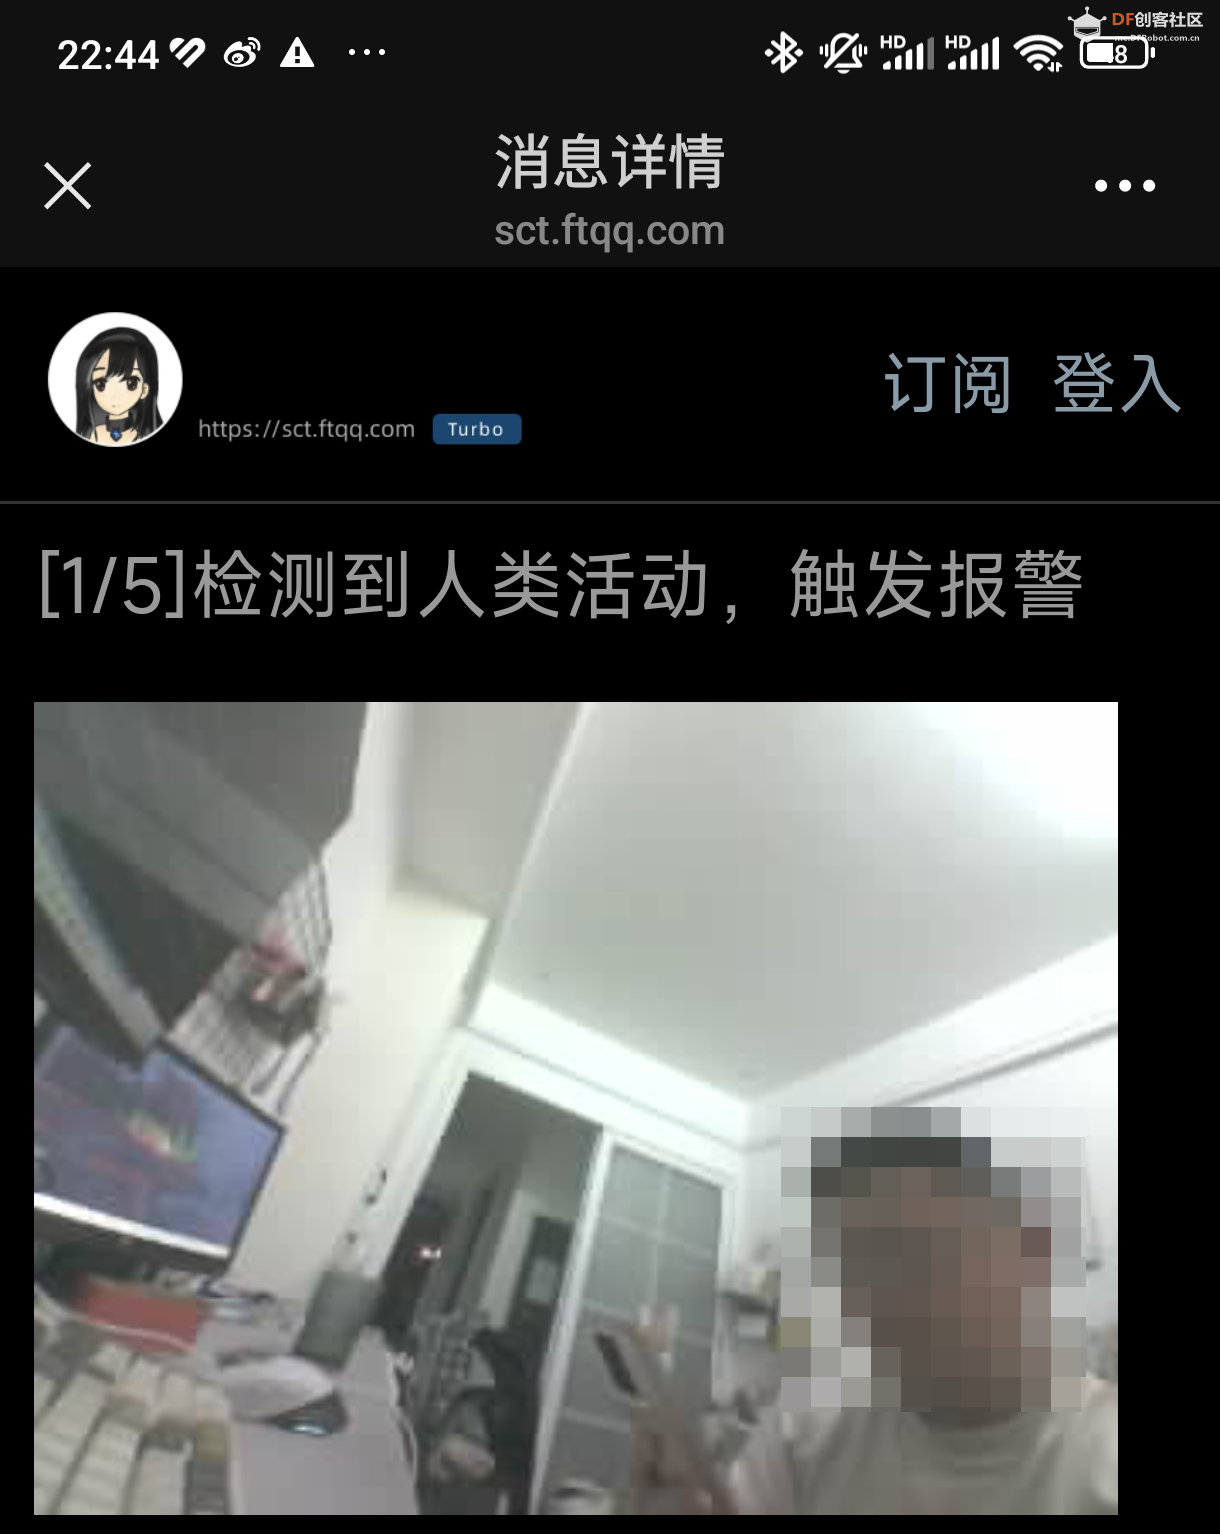
以下是识别到人类活动后的消息推送:
参考代码如下:
- import cv2
- import torch
- import time
- from yolov5 import YOLOv5
- import urllib.request
- import numpy as np
- import requests
- from img_upload import img_upload
-
- url = 'http://192.168.1.43:80/capture' # ESP32-CAM的IP地址
- sendkey = ''
- # Load the YOLOv5 model
- model_path = "d:/yolov5s.pt" # 模型路径
- device = torch.device("cuda:0" if torch.cuda.is_available() else "cpu")
- model = YOLOv5(model_path, device=device)
-
- last_alert_time = 0
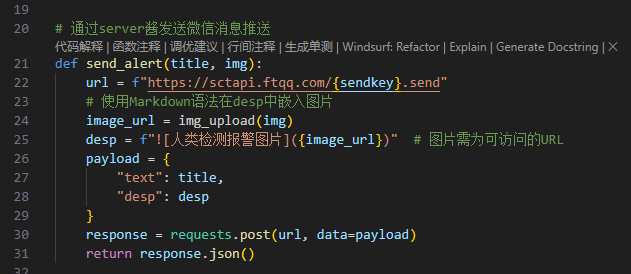
- # 通过server酱发送微信消息推送
- def send_alert(title, img):
- url = f"https://sctapi.ftqq.com/{sendkey}.send"
- # 使用Markdown语法在desp中嵌入图片
- image_url = img_upload(img)
- desp = f"" # 图片需为可访问的URL
- payload = {
- "text": title,
- "desp": desp
- }
- response = requests.post(url, data=payload)
- return response.json()
-
-
- while True:
- img_resp = urllib.request.urlopen(url) # 从URL获取图像数据
- img_source = img_resp.read()
- imgnp = np.array(bytearray(img_source), dtype=np.uint8) # 将图像数据转换为NumPy数
- frame = cv2.imdecode(imgnp, -1) # 解码JPEG图像数据
-
- # 记录处理开始时间
- start_time = time.time()
-
- # 将帧传递给模型进行预测
- results = model.predict(frame, size=640) # 调整输入图像大小为640x640
- # 遍历检测结果
- for i, det in enumerate(results.pred[0]):
- if det is not None and len(det):
- det = det.unsqueeze(0)
- for *xyxy, conf, cls in det:
- # 获取类别名称和置信度
- class_name = results.names[int(cls)]
- confidence = float(conf)
- print(f"检测到类别: {class_name}, 置信度: {confidence:.2f}")
- if class_name == "person" and confidence > 0.5:
- current_time = time.time()
- # 检查是否距离上次报警超过5分钟(300秒)
- if current_time - last_alert_time >= 300: # 5分钟内只报一次警
- print(f"检测到人类活动,触发报警")
- send_alert('检测到人类活动,触发报警', img_source)
- last_alert_time = current_time # 更新上次报警时间
- # 如需保存结果,可写入文件
-
- # 获取预测结果并在图像上绘制
- annotated_frame = results.render() # YOLOv5库中的render方法
- # 记录处理结束时间
- end_time = time.time()
- # 计算帧率
- processing_time = end_time - start_time
- fps = 1 / processing_time
- # 在图像上绘制帧率
- # cv2.putText(annotated_frame[0], f"FPS: {fps:.2f}", (10, 30), cv2.FONT_HERSHEY_SIMPLEX, 1, (0, 255, 0), 2, cv2.LINE_AA)
- # 提取可写副本
- img_output = annotated_frame[0].copy()
- cv2.putText(img_output, f"FPS: {fps:.2f}", (10, 30), cv2.FONT_HERSHEY_SIMPLEX, 1, (0, 255, 0), 2, cv2.LINE_AA)
- # 显示带有预测结果的帧
- cv2.imshow("YOLOv5 Detection", annotated_frame[0])
- # 打印详细信息到终端
- print(f"Processed frame in {processing_time:.4f} seconds, FPS: {fps:.2f}")
- # 按下 'q' 键退出
- if cv2.waitKey(1) & 0xFF == ord('q'):
- break
- # 释放摄像头资源并关闭所有窗口
- # cap.release()
- cv2.destroyAllWindows()
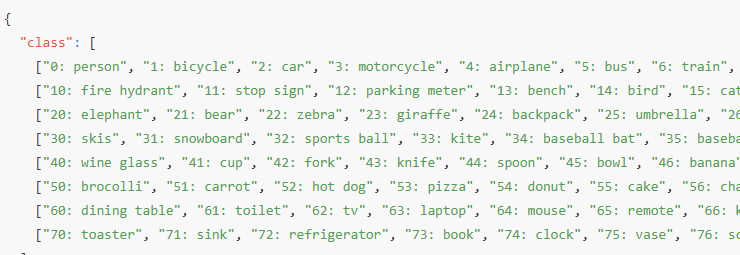
顺便提下,yoloV5的预训练分类如下展示,class 0 是 person,其它可查看以下部分分类信息。完整内容请自行查阅。
3. 实践过程中的几点思考:
这里重点说明下测试过程中,填的几个坑:

1). 如上图①所示,示例代码里的模型路径,需要使用绝对路径,否则默认寻找的路径是 %homepath% ,也就是说需要将 pt 文件拷贝到这个目录,也就用户目录如:C:\Users\你的用户名\yolov5s.pt。如果此路径没有这个文件,他会去 https://github.com/ultralytics/y ... oad/v7.0/yolov5s.pt 下载,而这个下载地址有时候是需要特殊网络的!!!
2). 如上图②所示,因为我装的是 GPU 版的torch!!!,这里应该是使用 'cuda:0',而不是实例代码的 'cuda'。
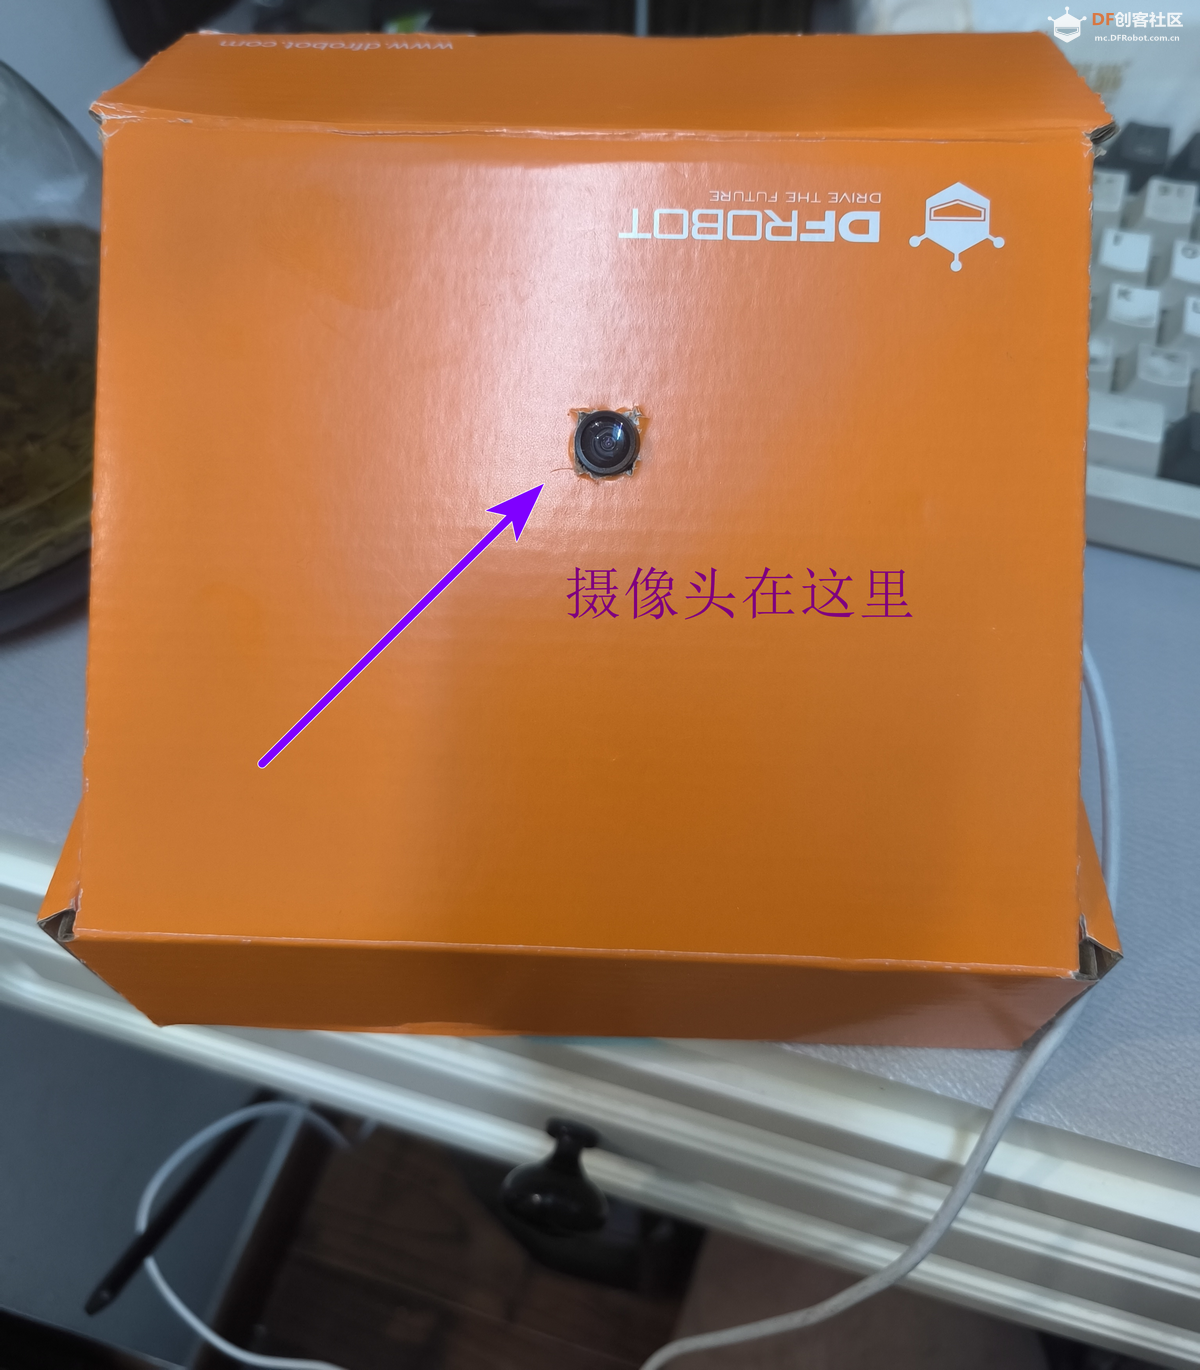
三、安装图
| 

 沪公网安备31011502402448
 置顶卡
置顶卡 变色卡
变色卡 千斤顶
千斤顶