本帖最后由 aramy 于 2023-8-22 21:07 编辑
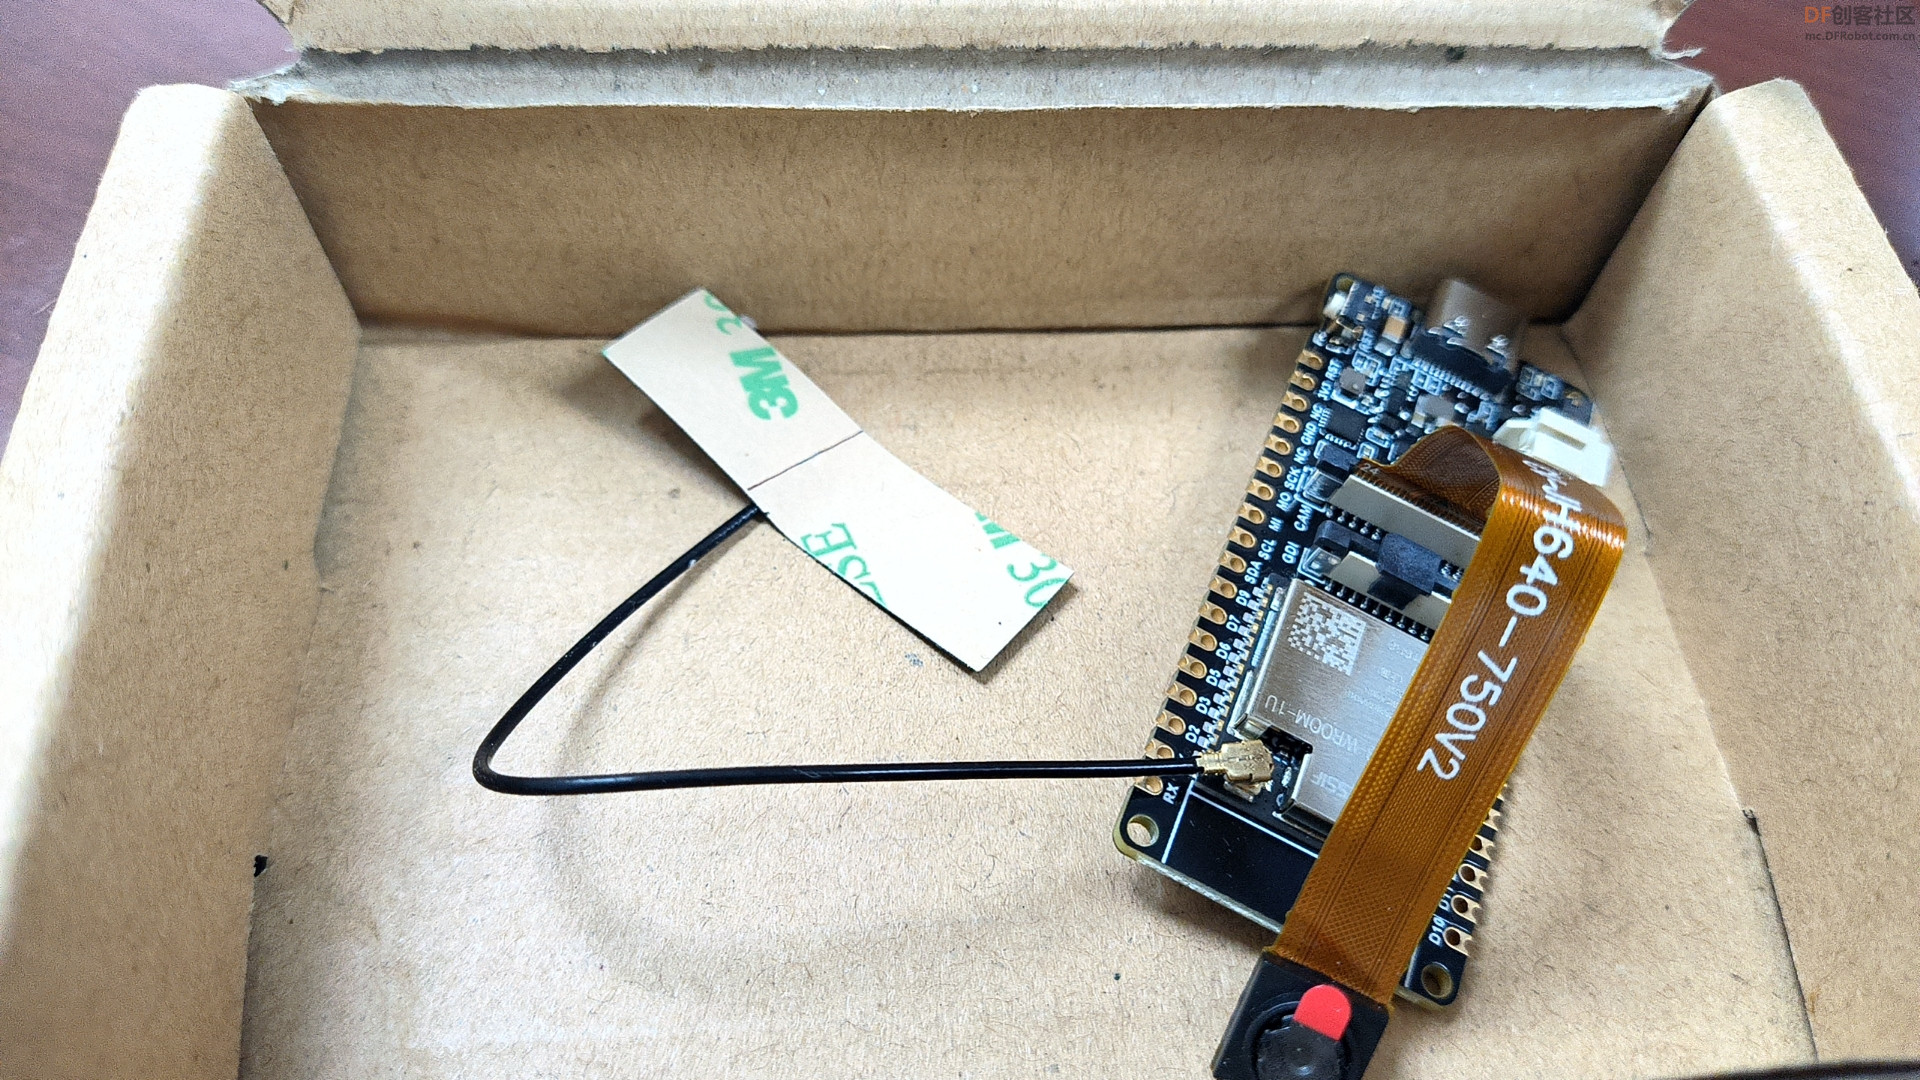
参加Dfrobot官方的S3 的申请试用,人品大爆发,居然中了。真是开心。板子上有OV2640的摄像头,加上ESP32-S3强大的算力。一直有羡慕乐鑫在AI方面的功能,现在自己有了板子,也会去努力尝试一番的。
拿到板子晚了几天,迫不及待地将esp-who下的例程,烧写进去,不出意外地不能工作。看来还是得一步一步地学习。那么就先从熟悉点的 Arduino开始吧!用Vscode+platformio先做个最简单的串口程序。 - #include <Arduino.h>
- #include "esp32-hal-log.h"
- void setup()
- {
- Serial.begin(115200);
- Serial.println("Starting"); // will be shown in the terminal
- Serial.setDebugOutput(true);
- }
-
- void loop()
- {
- log_e("Total PSRAM: %d Free PSRAM: %d ", ESP.getPsramSize(), ESP.getFreePsram());
- Serial.println("Hello!");
- delay(1000);
- }
结果是啥都不输出。翻看论坛中老师的帖子明白是配置错误,修改了%homepath%\.platformio\platforms\espressif32\boards下的dfrobot_firebeetle2_esp32s3.json文件,至此成功地输出了串口日志。
- {
- "build": {
- "arduino": {
- "partitions":"app3M_fat9M_16MB.csv",
- "ldscript": "esp32s3_out.ld",
- "memory_type":"qio_opi"
- },
- "core": "esp32",
- "extra_flags": [
- "-DBOARD_HAS_PSRAM",
- "-DARDUINO_ESP32S3_DEV",
- "-DARDUINO_USB_MODE=1",
- "-DARDUINO_RUNNING_CORE=1",
- "-DARDUINO_EVENT_RUNNING_CORE=1",
- "-DARDUINO_USB_CDC_ON_BOOT=1"
- ],
- "f_cpu": "240000000L",
- "f_flash": "80000000L",
- "flash_mode": "qio",
- "hwids": [
- [
- "0x303A",
- "0x83CF"
- ],
- [
- "0x303A",
- "0x1001"
- ]
- ],
- "mcu": "esp32s3",
- "variant": "dfrobot_firebeetle2_esp32s3"
- },
- "connectivity": [
- "wifi"
- ],
- "debug": {
- "openocd_target": "esp32s3.cfg"
- },
- "frameworks": [
- "arduino",
- "espidf"
- ],
- "name": "DFRobot Firebeetle 2 ESP32-S3",
- "upload": {
- "flash_size": "16MB",
- "maximum_ram_size": 327680,
- "maximum_size": 16777216,
- "require_upload_port": true,
- "speed": 460800
- },
- "url": "https://www.dfrobot.com/product-1590.html",
- "vendor": "DFRobot"
- }
接下来就是去读取OV2640的数据了,参考camera_web_server的例程,将读取摄像头部分单独剥离出来,尝试初始化摄像头,但是报错:E (18) camera: Camera probe failed with error 0x105(ESP_ERR_NOT_FOUND。提示端口打卡错误。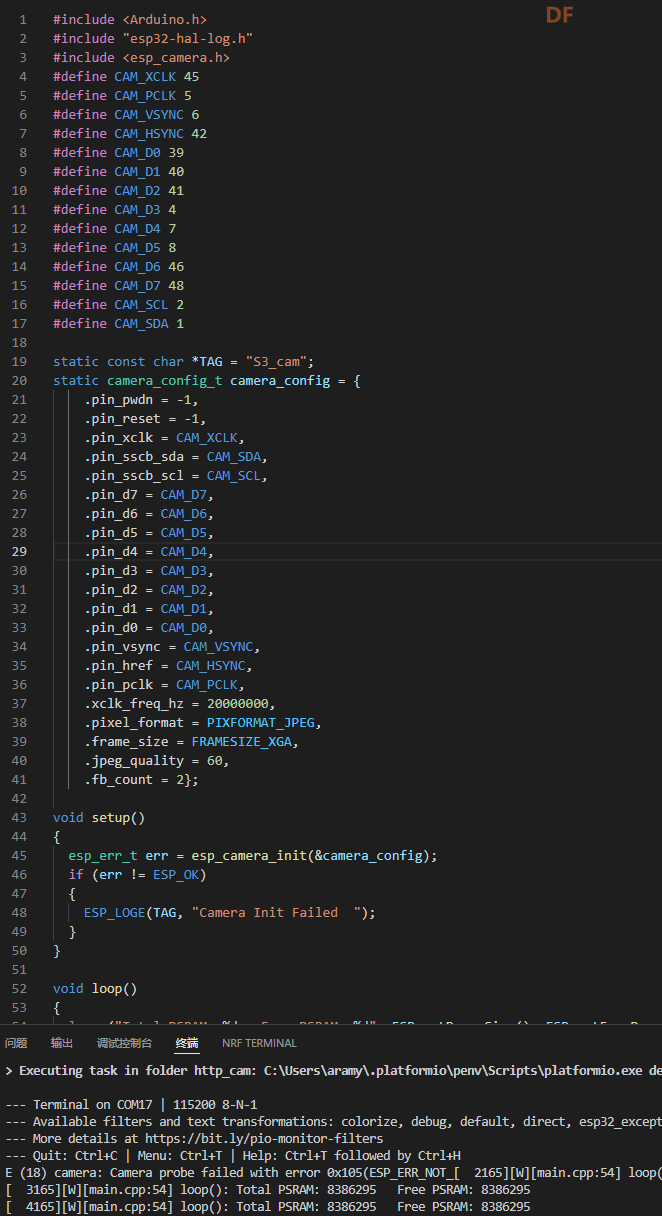
经过老师提醒,再去看电路图才发现摄像头的电源由一颗AXP313A电源芯片来控制,需要给它I2C命令来进行驱动。https://github.com/cdjq/DFRobot_AXP313A这里有驱动电源的例子,参考着例子重新驱动起摄像头,成功读取了OV2640. - #include "ov2640.h"
- #include "esp32-hal-log.h"
- DFRobot_AXP313A axp;
-
- uint8_t camera_init()
- {
- axp.enableCameraPower(axp.eOV2640); // 设置摄像头供电
- delay(200);
- //摄像头配置初始化
- camera_config_t camera_config = {
- .pin_pwdn = -1,
- .pin_reset = -1,
- .pin_xclk = CAM_XCLK,
- .pin_sscb_sda = CAM_SDA,
- .pin_sscb_scl = CAM_SCL,
-
- .pin_d7 = CAM_D7,
- .pin_d6 = CAM_D6,
- .pin_d5 = CAM_D5,
- .pin_d4 = CAM_D4,
- .pin_d3 = CAM_D3,
- .pin_d2 = CAM_D2,
- .pin_d1 = CAM_D1,
- .pin_d0 = CAM_D0,
- .pin_vsync = CAM_VSYNC,
- .pin_href = CAM_HSYNC,
- .pin_pclk = CAM_PCLK,
-
- .xclk_freq_hz = 20000000,
- .ledc_timer = LEDC_TIMER_0,
- .ledc_channel = LEDC_CHANNEL_0,
- .pixel_format = PIXFORMAT_JPEG,
- .frame_size = FRAMESIZE_SVGA,
- .jpeg_quality = 8,
- .fb_count = 2};
-
- // camera init
- esp_err_t err = esp_camera_init(&camera_config);
- if (err != ESP_OK)
- {
- ESP_LOGE(TAG, "Camera Init Failed");
- }
- // sensor_t *s = esp_camera_sensor_get();
-
- return 0;
- }
-
- // 将图片发送给网络.
- void TaskImgToWifi(void *pvParameters)
- {
- startstream();
- camera_init();
- camera_fb_t *pic = NULL;
- for (;;)
- {
- pic = esp_camera_fb_get();
- log_d("img_buf_len=%d , width=%d , height=%d ", pic->len, pic->height, pic->width);
- // log_e("Total heap: %d, %d", ESP.getHeapSize(),ESP.getFreeHeap());
- // log_e("Total PSRAM: %d, %d", ESP.getPsramSize(), ESP.getFreePsram());
- stprint(pic);
- esp_camera_fb_return(pic);
- }
- }
- #include <Arduino.h>
- #include "wifi_conn.h"
- #include "ov2640.h"
- #include "esp32-hal-log.h"
- #include <picstream.h>
-
- void setup()
- {
- Serial.begin(115200);
- Serial.println("Starting"); // will be shown in the terminal
- Serial.setDebugOutput(true);
- // camera_init();
- // delay(1000);
- xTaskCreatePinnedToCore(keepWiFiAlive, "keepWiFiAlive", 2048, NULL, 1, NULL, ARDUINO_RUNNING_CORE); //检查wifi状态的任务
- delay(1000);
- xTaskCreatePinnedToCore(TaskImgToWifi, "TaskImgToWifi", 2048, NULL, 1, NULL, ARDUINO_RUNNING_CORE); //启动摄像头任务
- }
-
- void loop()
- {
- // log_e("Total PSRAM: %d Free PSRAM: %d ", ESP.getPsramSize(), ESP.getFreePsram());
- Serial.println(WiFi.localIP());
- delay(5000);
- }
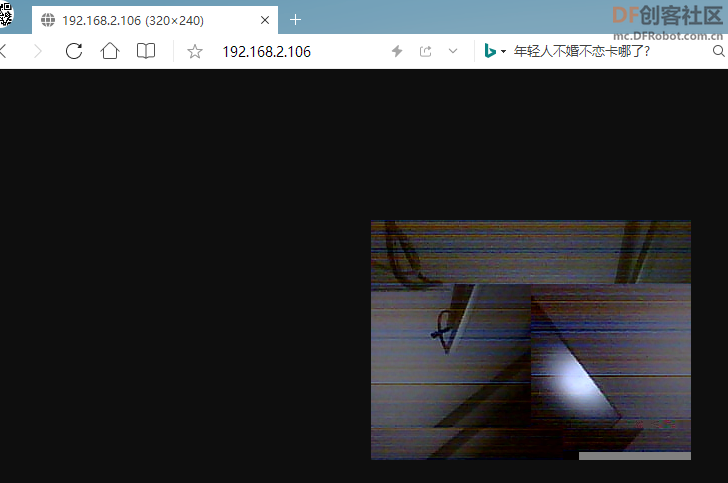
因为这个板子没有屏幕,所以这里使用了http流的方式,将获得到的图片分发出去。终端上只要是在同一个局域网内,通过浏览器就可以直接访问到摄像头的图片了。 - #include "picstream.h"
- #define PART_BOUNDARY "123456789000000000000987654321"
- static const char* _STREAM_CONTENT_TYPE = "multipart/x-mixed-replace;boundary=" PART_BOUNDARY;
- static const char* _STREAM_BOUNDARY = "\r\n--" PART_BOUNDARY "\r\n";
- static const char* _STREAM_PART = "Content-Type: image/jpeg\r\nContent-Length: %u\r\n\r\n";
-
-
- httpd_handle_t stream_httpd = NULL;
- httpd_handle_t camera_httpd = NULL;
- camera_fb_t * fb = NULL;
- camera_fb_t fm;
- boolean re=0;
- static esp_err_t stream_handler(httpd_req_t *req){
- esp_err_t res = ESP_OK;
- size_t _jpg_buf_len = 0;
- uint8_t * _jpg_buf = NULL;
- char * part_buf[64];
- res = httpd_resp_set_type(req, _STREAM_CONTENT_TYPE);
- if(res != ESP_OK){
- return res;
- }
- while(true){
- // fb= esp_camera_fb_get();
- delay(1);
- if(re){
- // Serial.println(2);
- if(fb->format != PIXFORMAT_JPEG){
- bool jpeg_converted = frame2jpg(fb, 80, &_jpg_buf, &_jpg_buf_len);
- esp_camera_fb_return(fb);
- fb = NULL;
- if(!jpeg_converted){
- Serial.println("JPEG compression failed");
- res = ESP_FAIL;
- }
- } else {
- _jpg_buf_len = fb->len;
- _jpg_buf = fb->buf;
- }
- if(res == ESP_OK){
- size_t hlen = snprintf((char *)part_buf, 64, _STREAM_PART, _jpg_buf_len);
- res = httpd_resp_send_chunk(req, (const char *)part_buf, hlen);
- }
- if(res == ESP_OK){
- res = httpd_resp_send_chunk(req, (const char *)_jpg_buf, _jpg_buf_len);
- }
- if(res == ESP_OK){
- res = httpd_resp_send_chunk(req, _STREAM_BOUNDARY, strlen(_STREAM_BOUNDARY));
- }
- if(res != ESP_OK){
- break;
- }
- if(fb){
- esp_camera_fb_return(fb);
- fb = NULL;
- _jpg_buf = NULL;
- }
- if(_jpg_buf){
- free(_jpg_buf);
- _jpg_buf = NULL;
- }
- re=0;
- }
- }
- return res;
- }
-
- void startstream()
- {
- httpd_config_t config = HTTPD_DEFAULT_CONFIG();
-
- httpd_uri_t stream_uri = {
- .uri = "/",
- .method = HTTP_GET,
- .handler = stream_handler,
- .user_ctx = NULL
- };
- Serial.printf("Starting stream server on port: '%d'\n", config.server_port);
- if (httpd_start(&stream_httpd, &config) == ESP_OK) {
- httpd_register_uri_handler(stream_httpd, &stream_uri);
- }else{
- Serial.println("Starting stream server failed");
- }
- }
- void stprint(camera_fb_t * frame){
- // fm=*frame;
- fb=frame;
- re=1;
- }
 先能点亮摄像头啦!摄像头膜还没撕,感觉代码有内存泄漏,时间久了会死机。继续折腾。
|

 沪公网安备31011502402448
 置顶卡
置顶卡 变色卡
变色卡 千斤顶
千斤顶