本帖最后由 云天 于 2021-12-17 21:50 编辑
【项目设计】
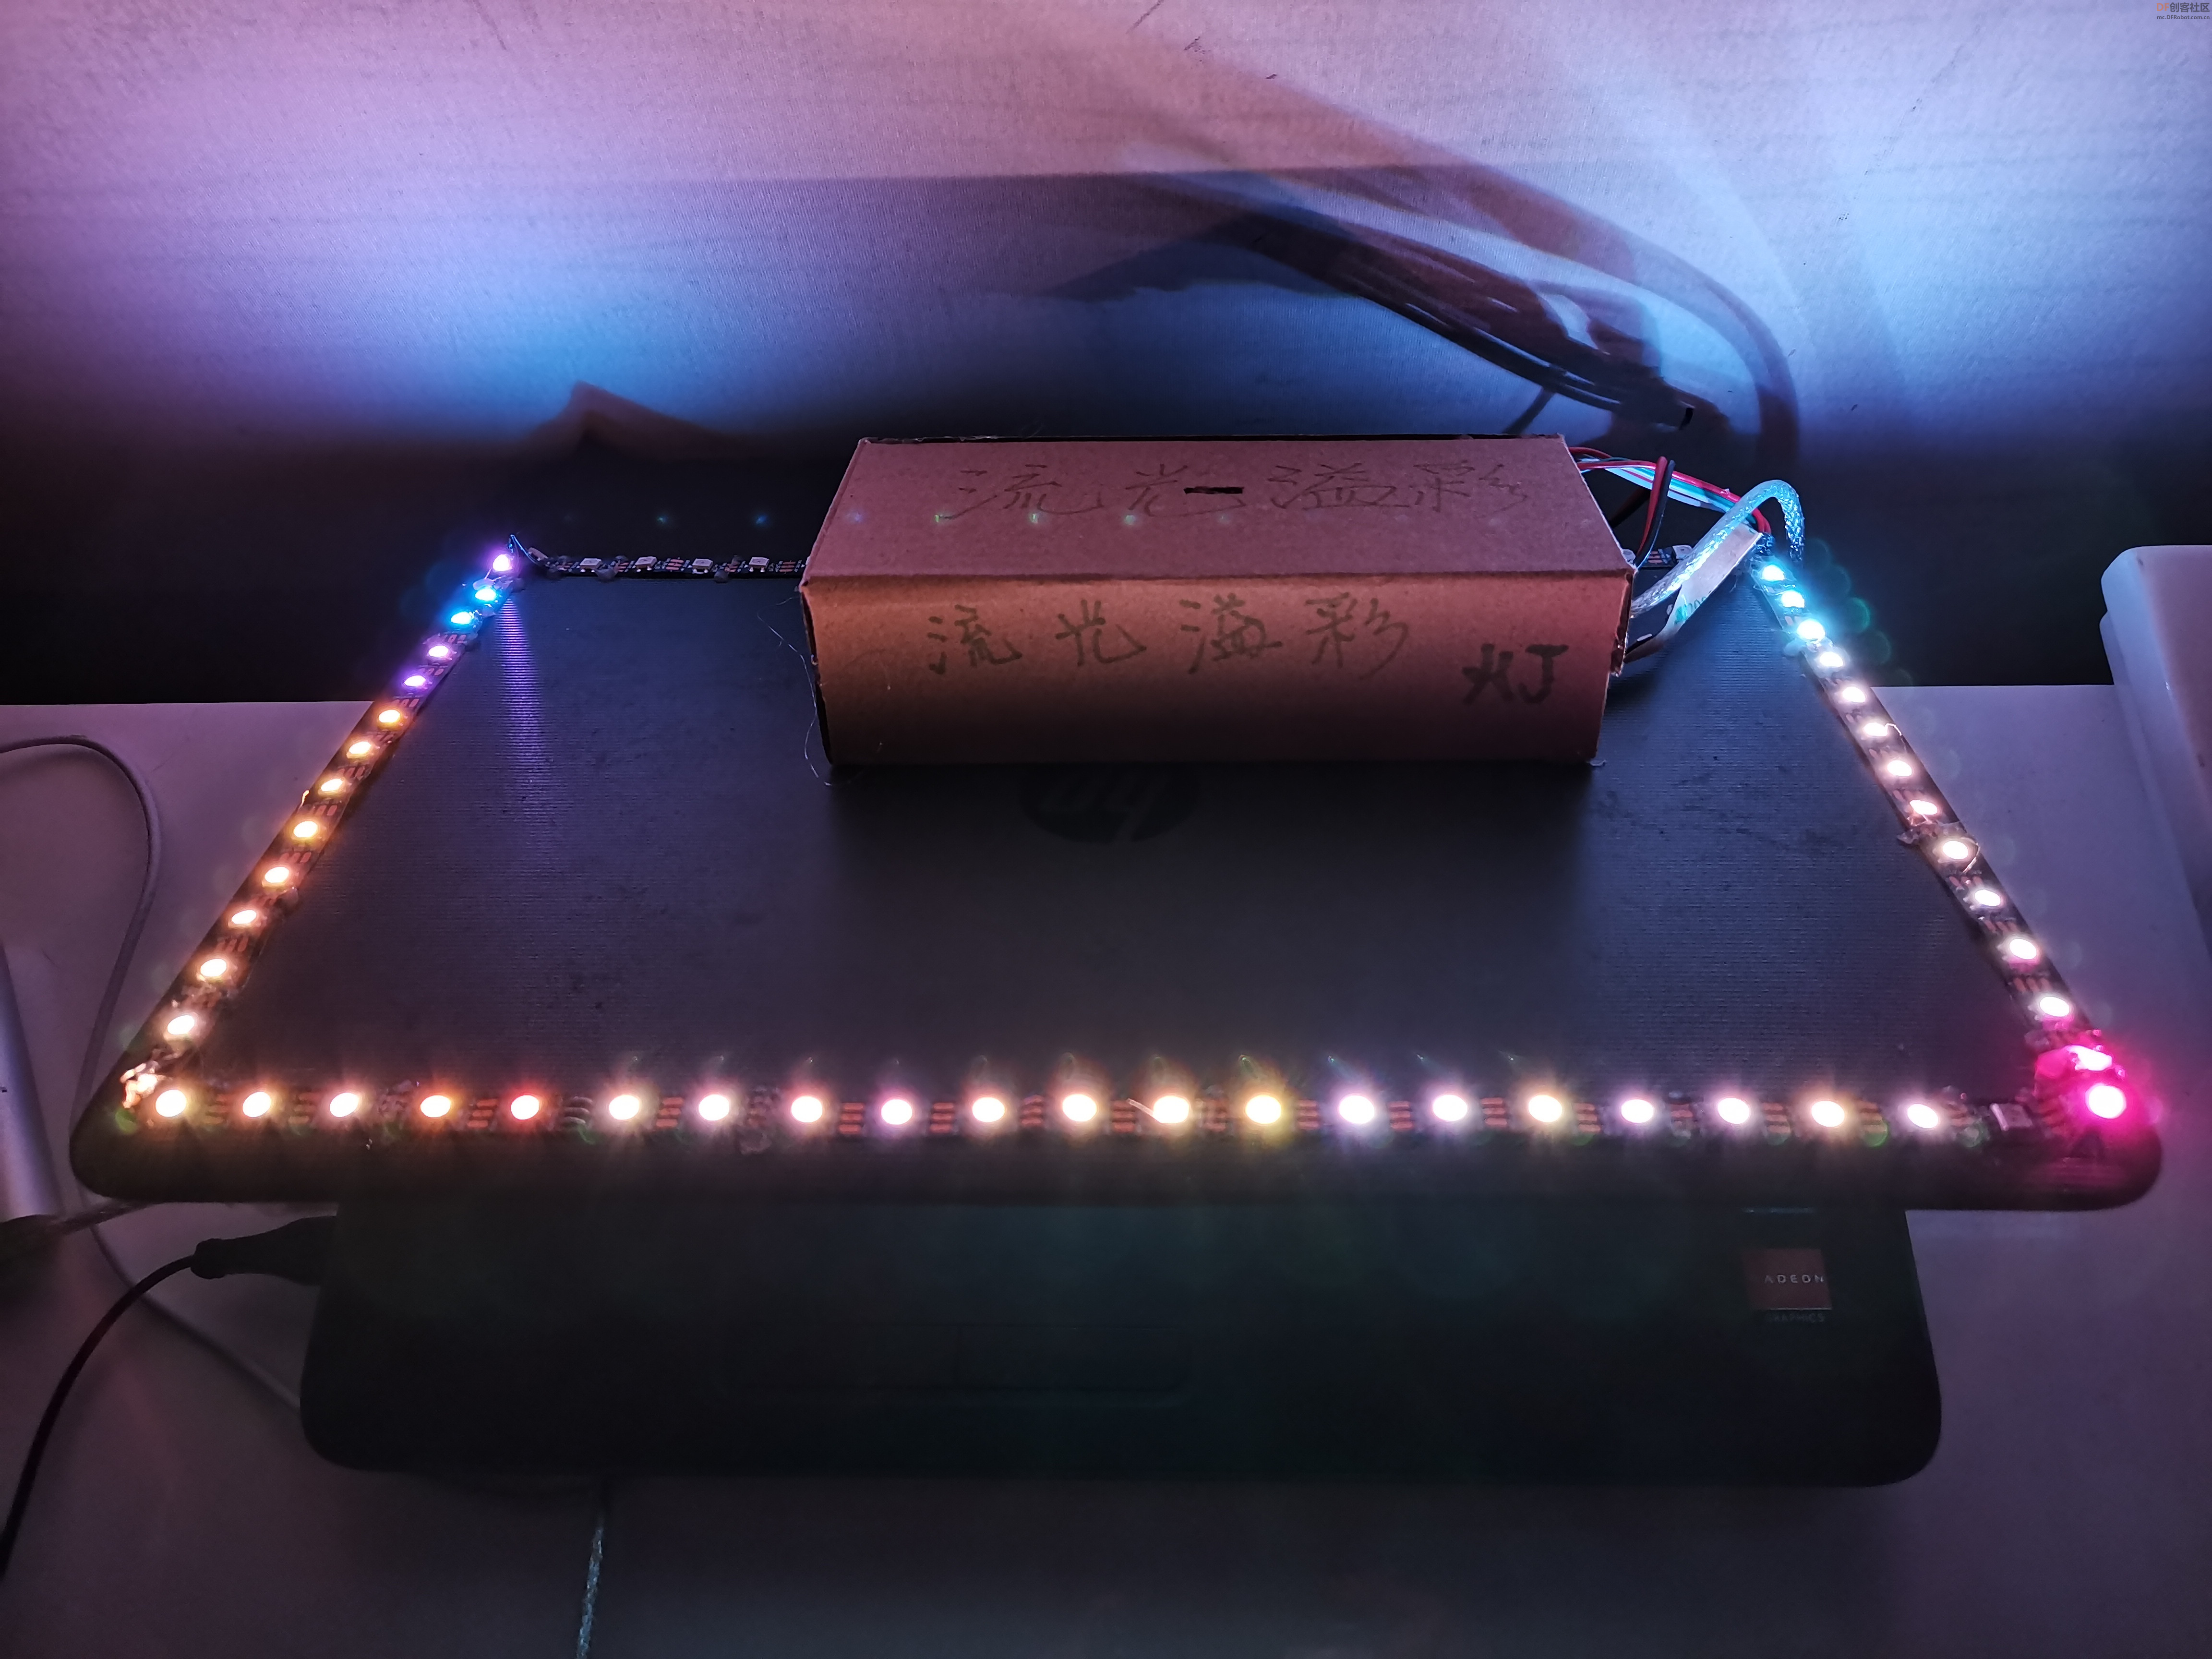
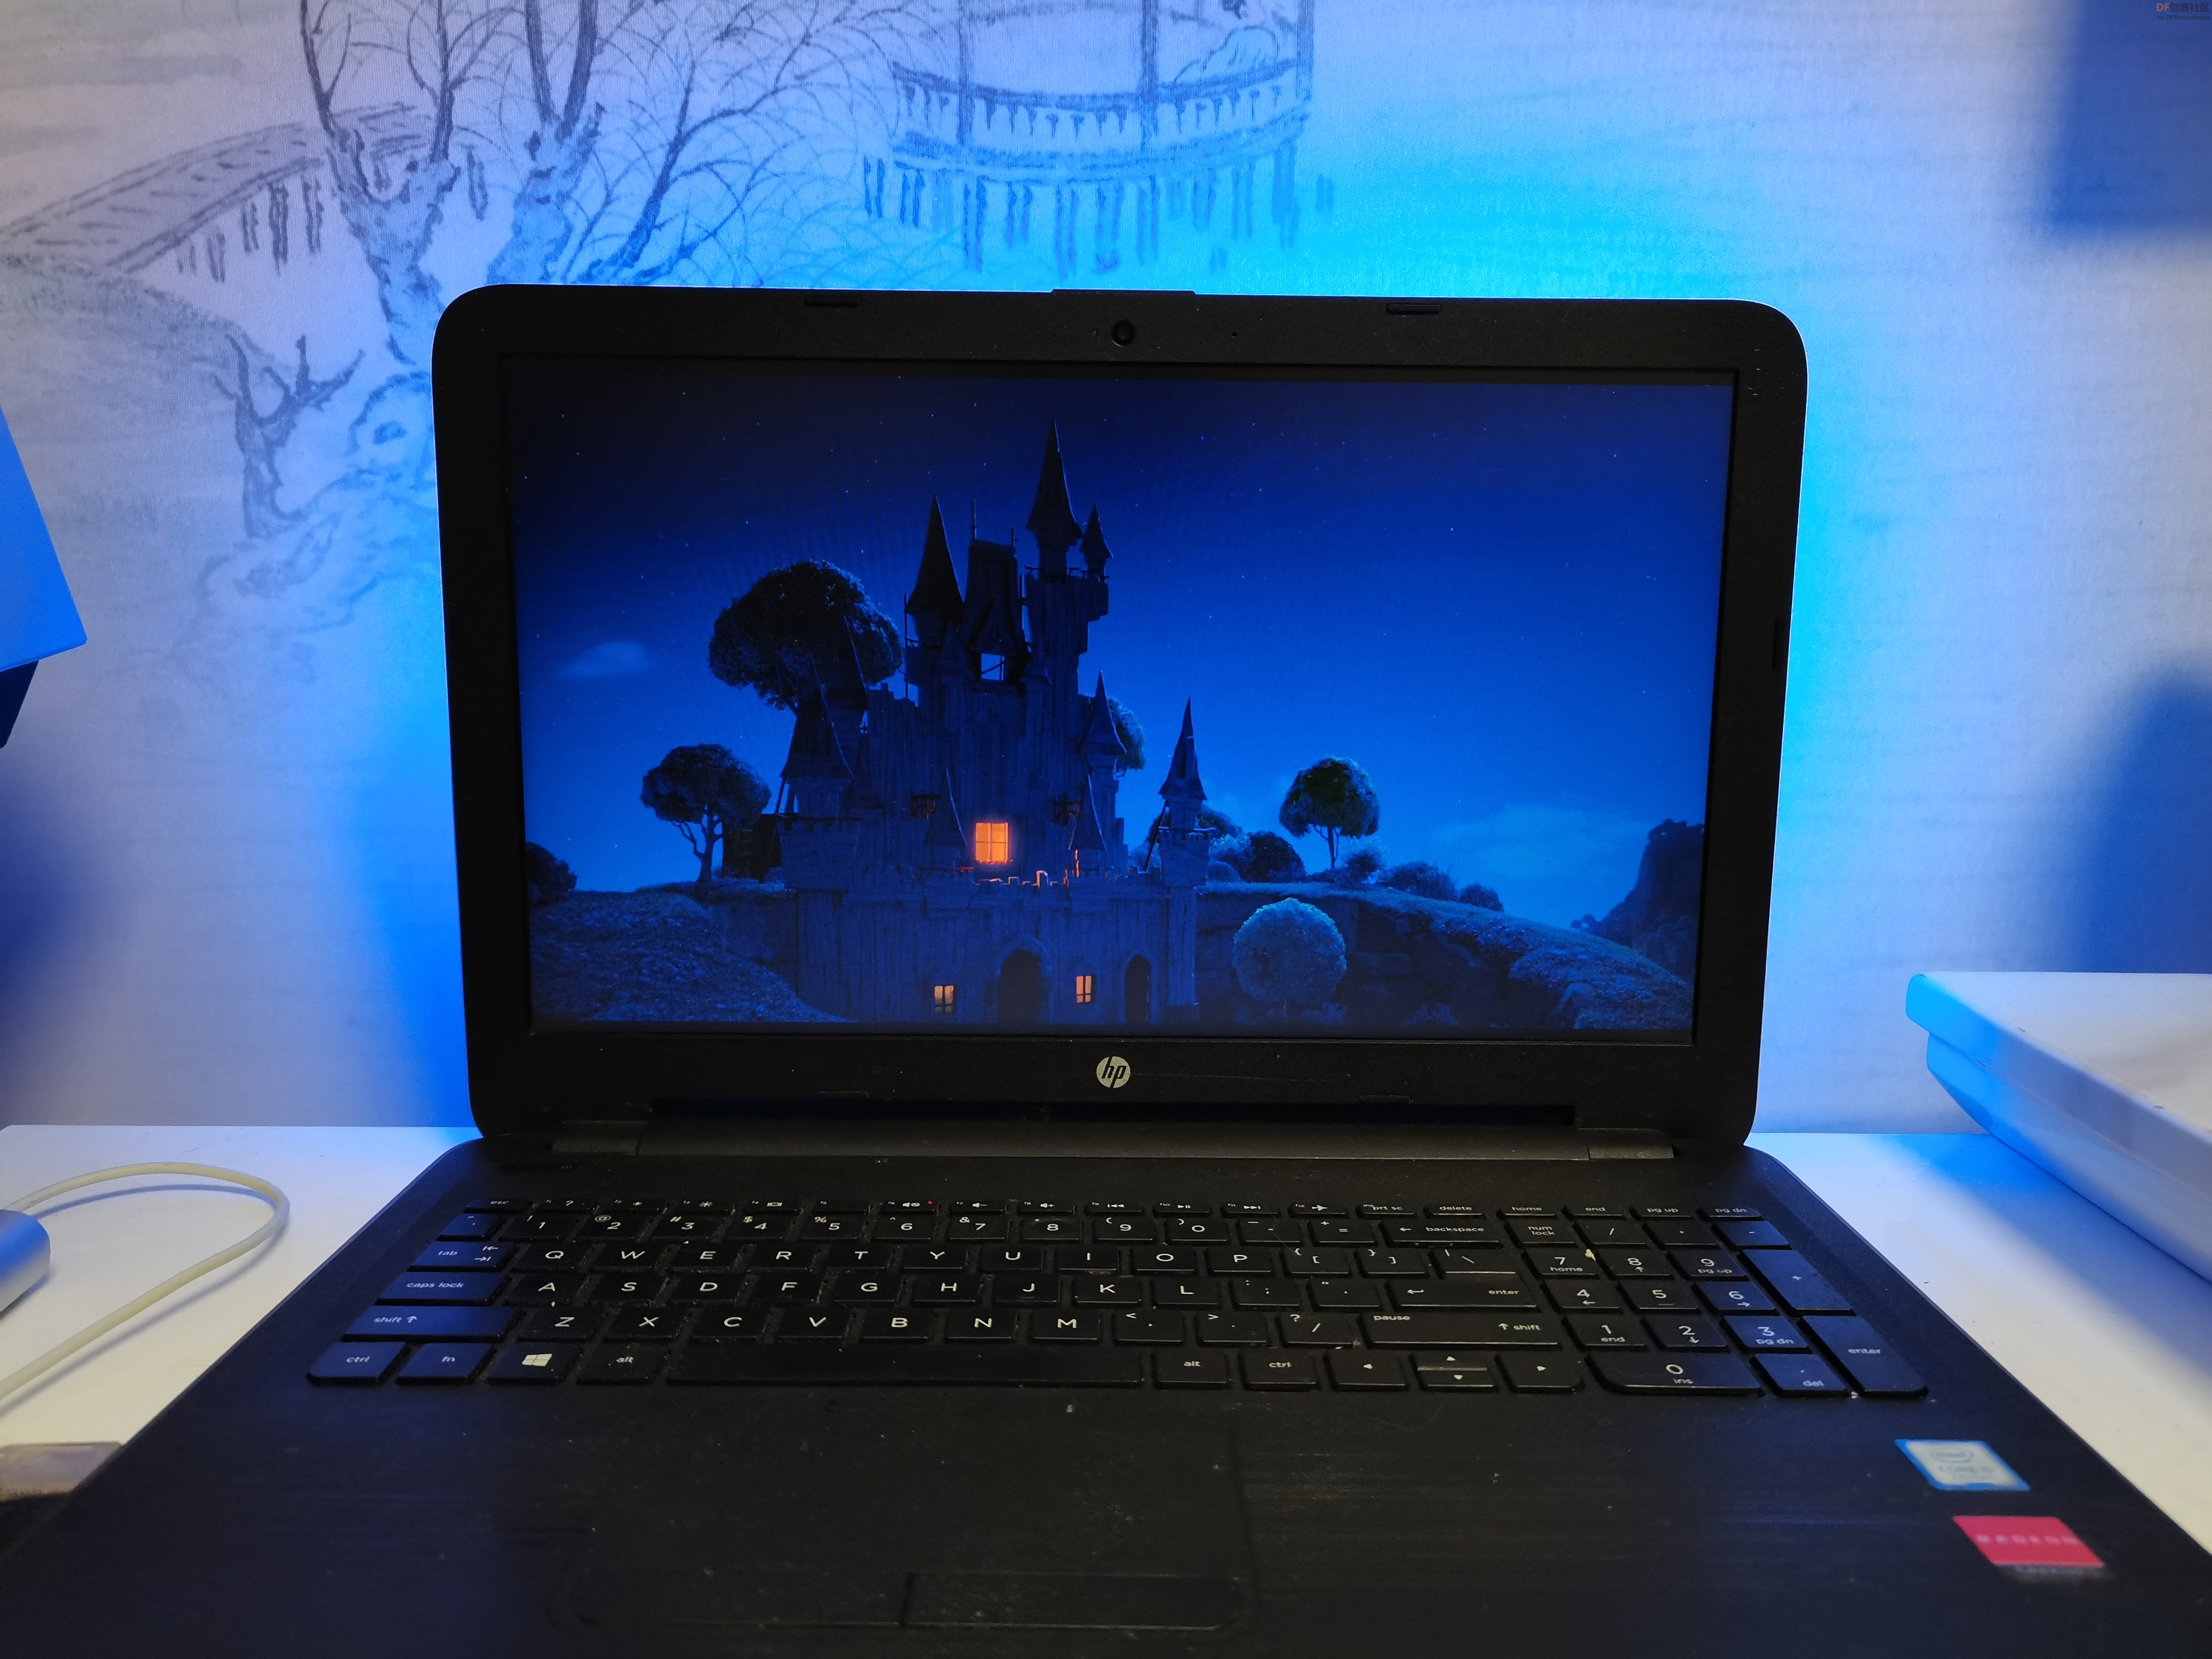
”流光溢彩灯“有非常炫酷的效果,它可以根据不同的画面和内容,配备在显示器后方的墙壁上投射出不同颜色的LED灯光。这个流光溢彩灯能够通过Python识别当前屏幕上显示的内容,自动调节出与当前屏幕画面相近的灯效,将屏幕上的画面延伸到屏幕之外,营造出更大的让人身临其境的视觉氛围。
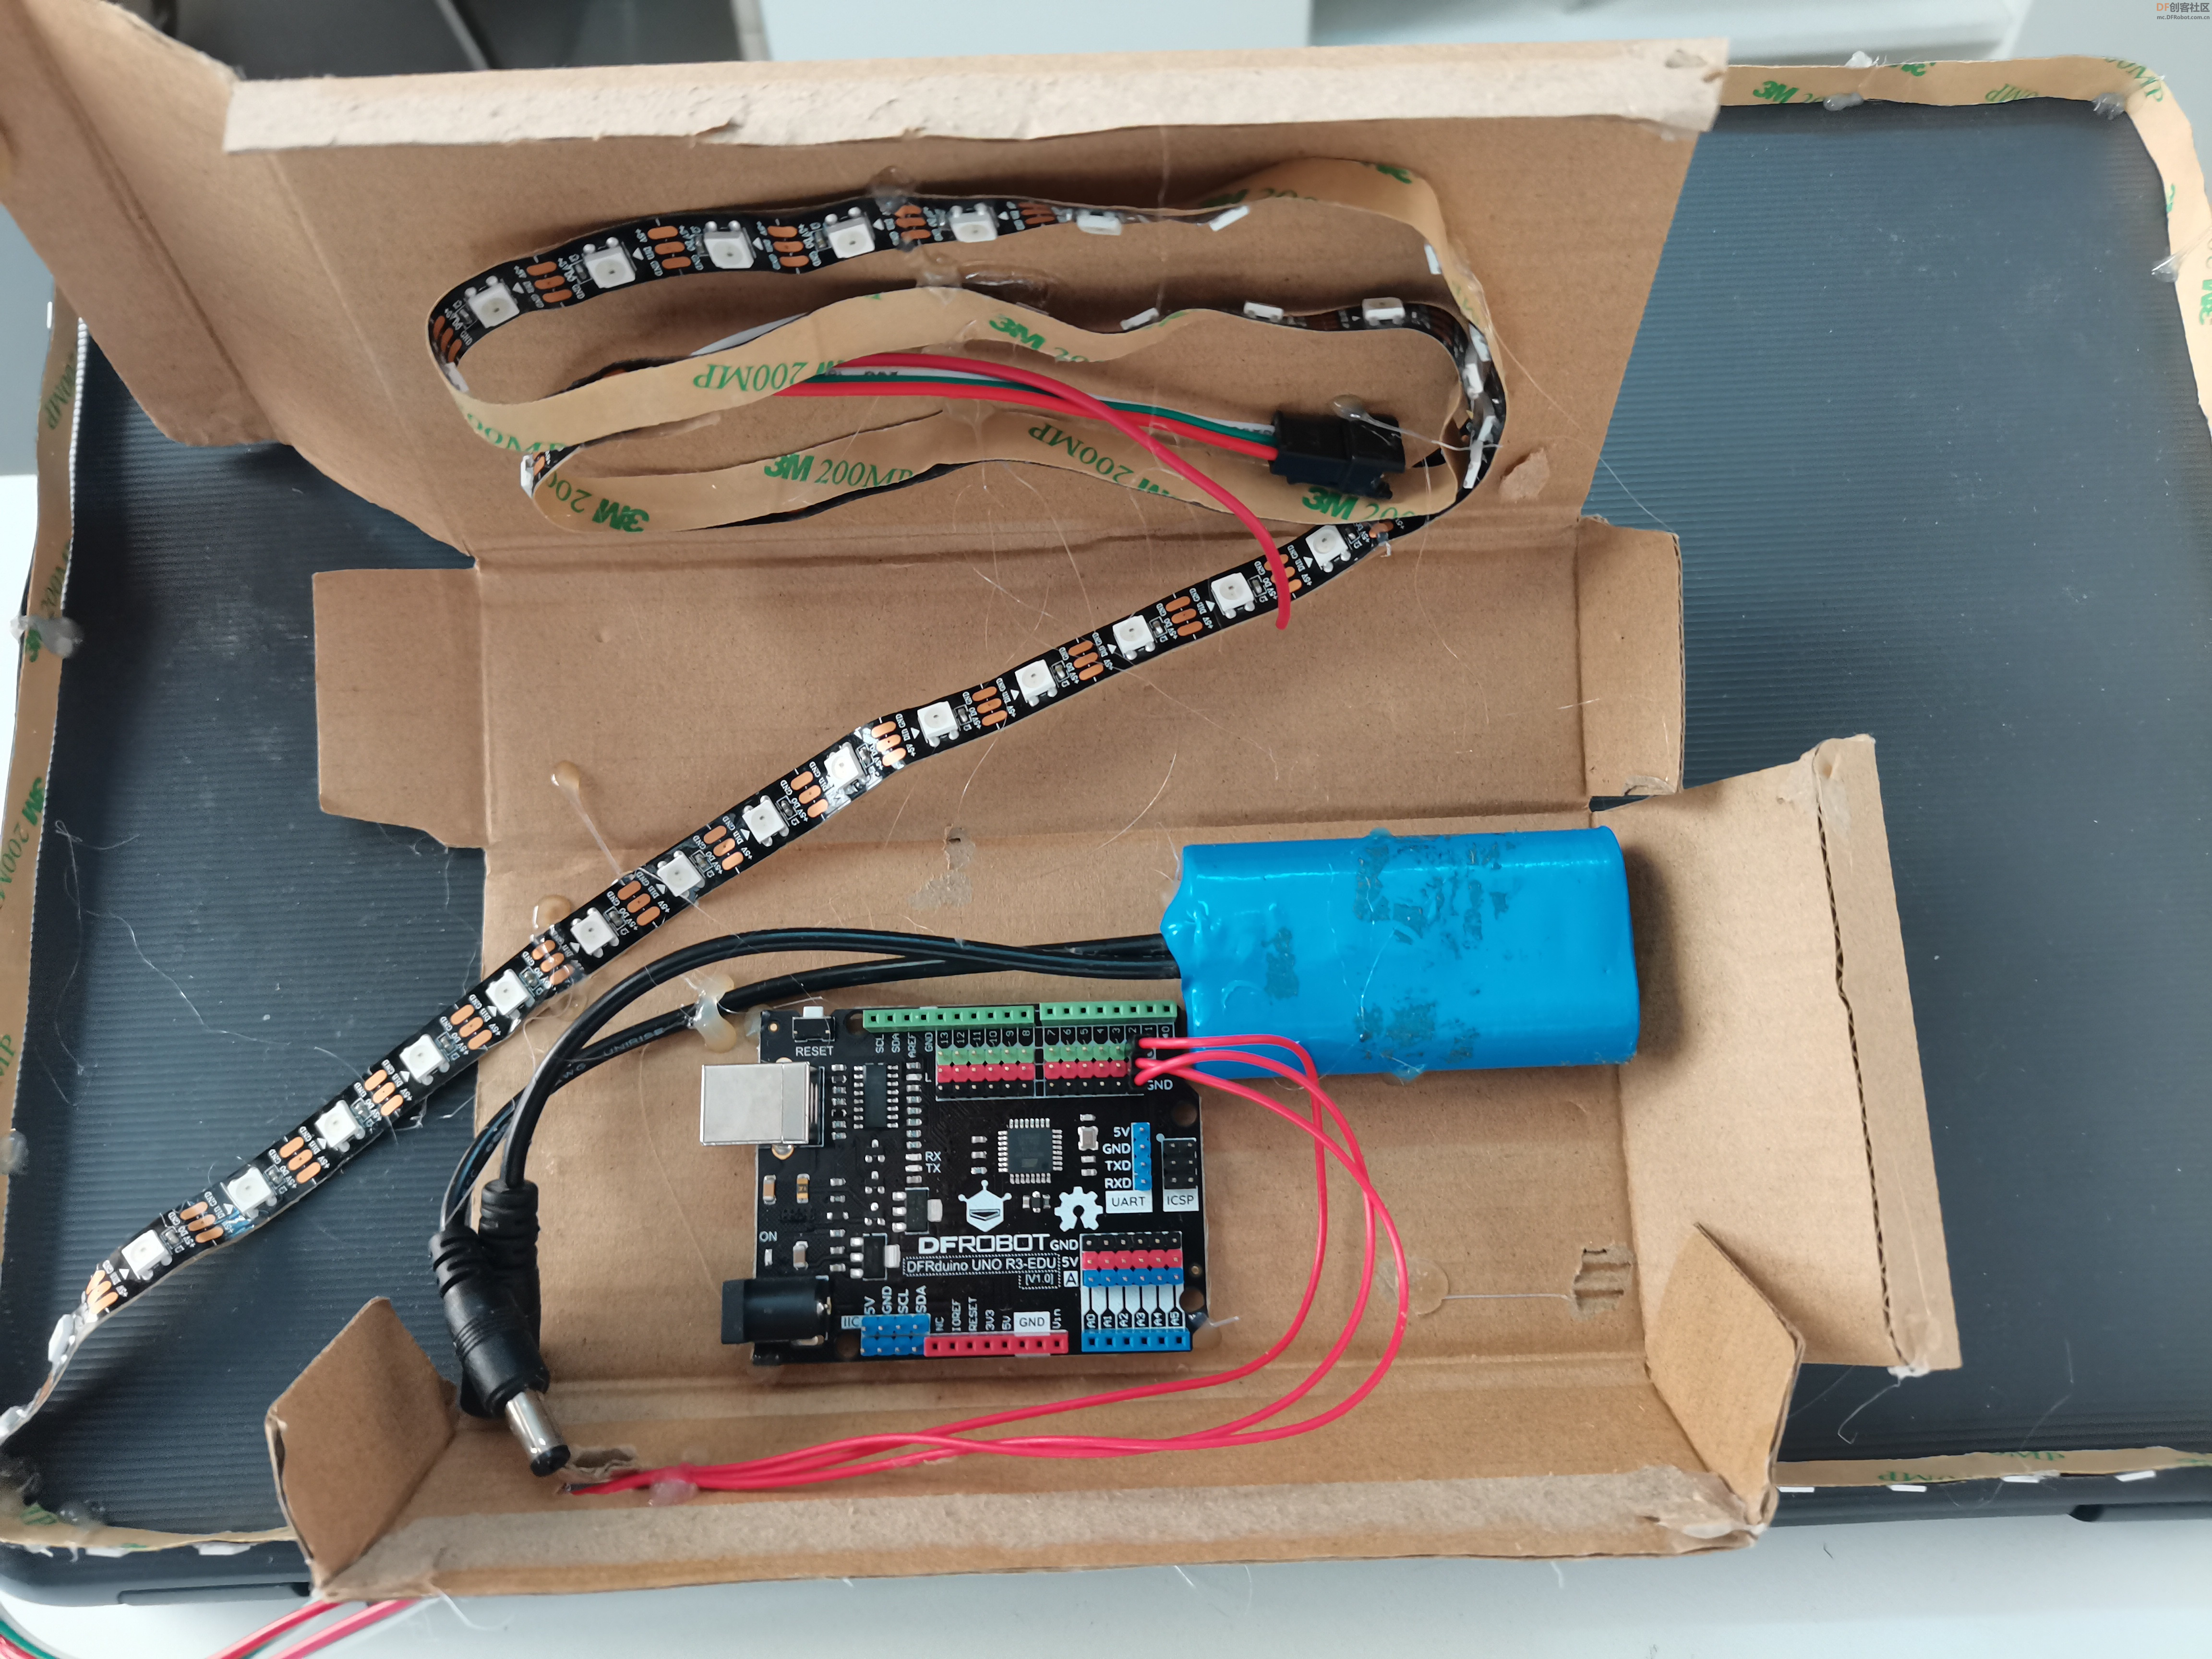
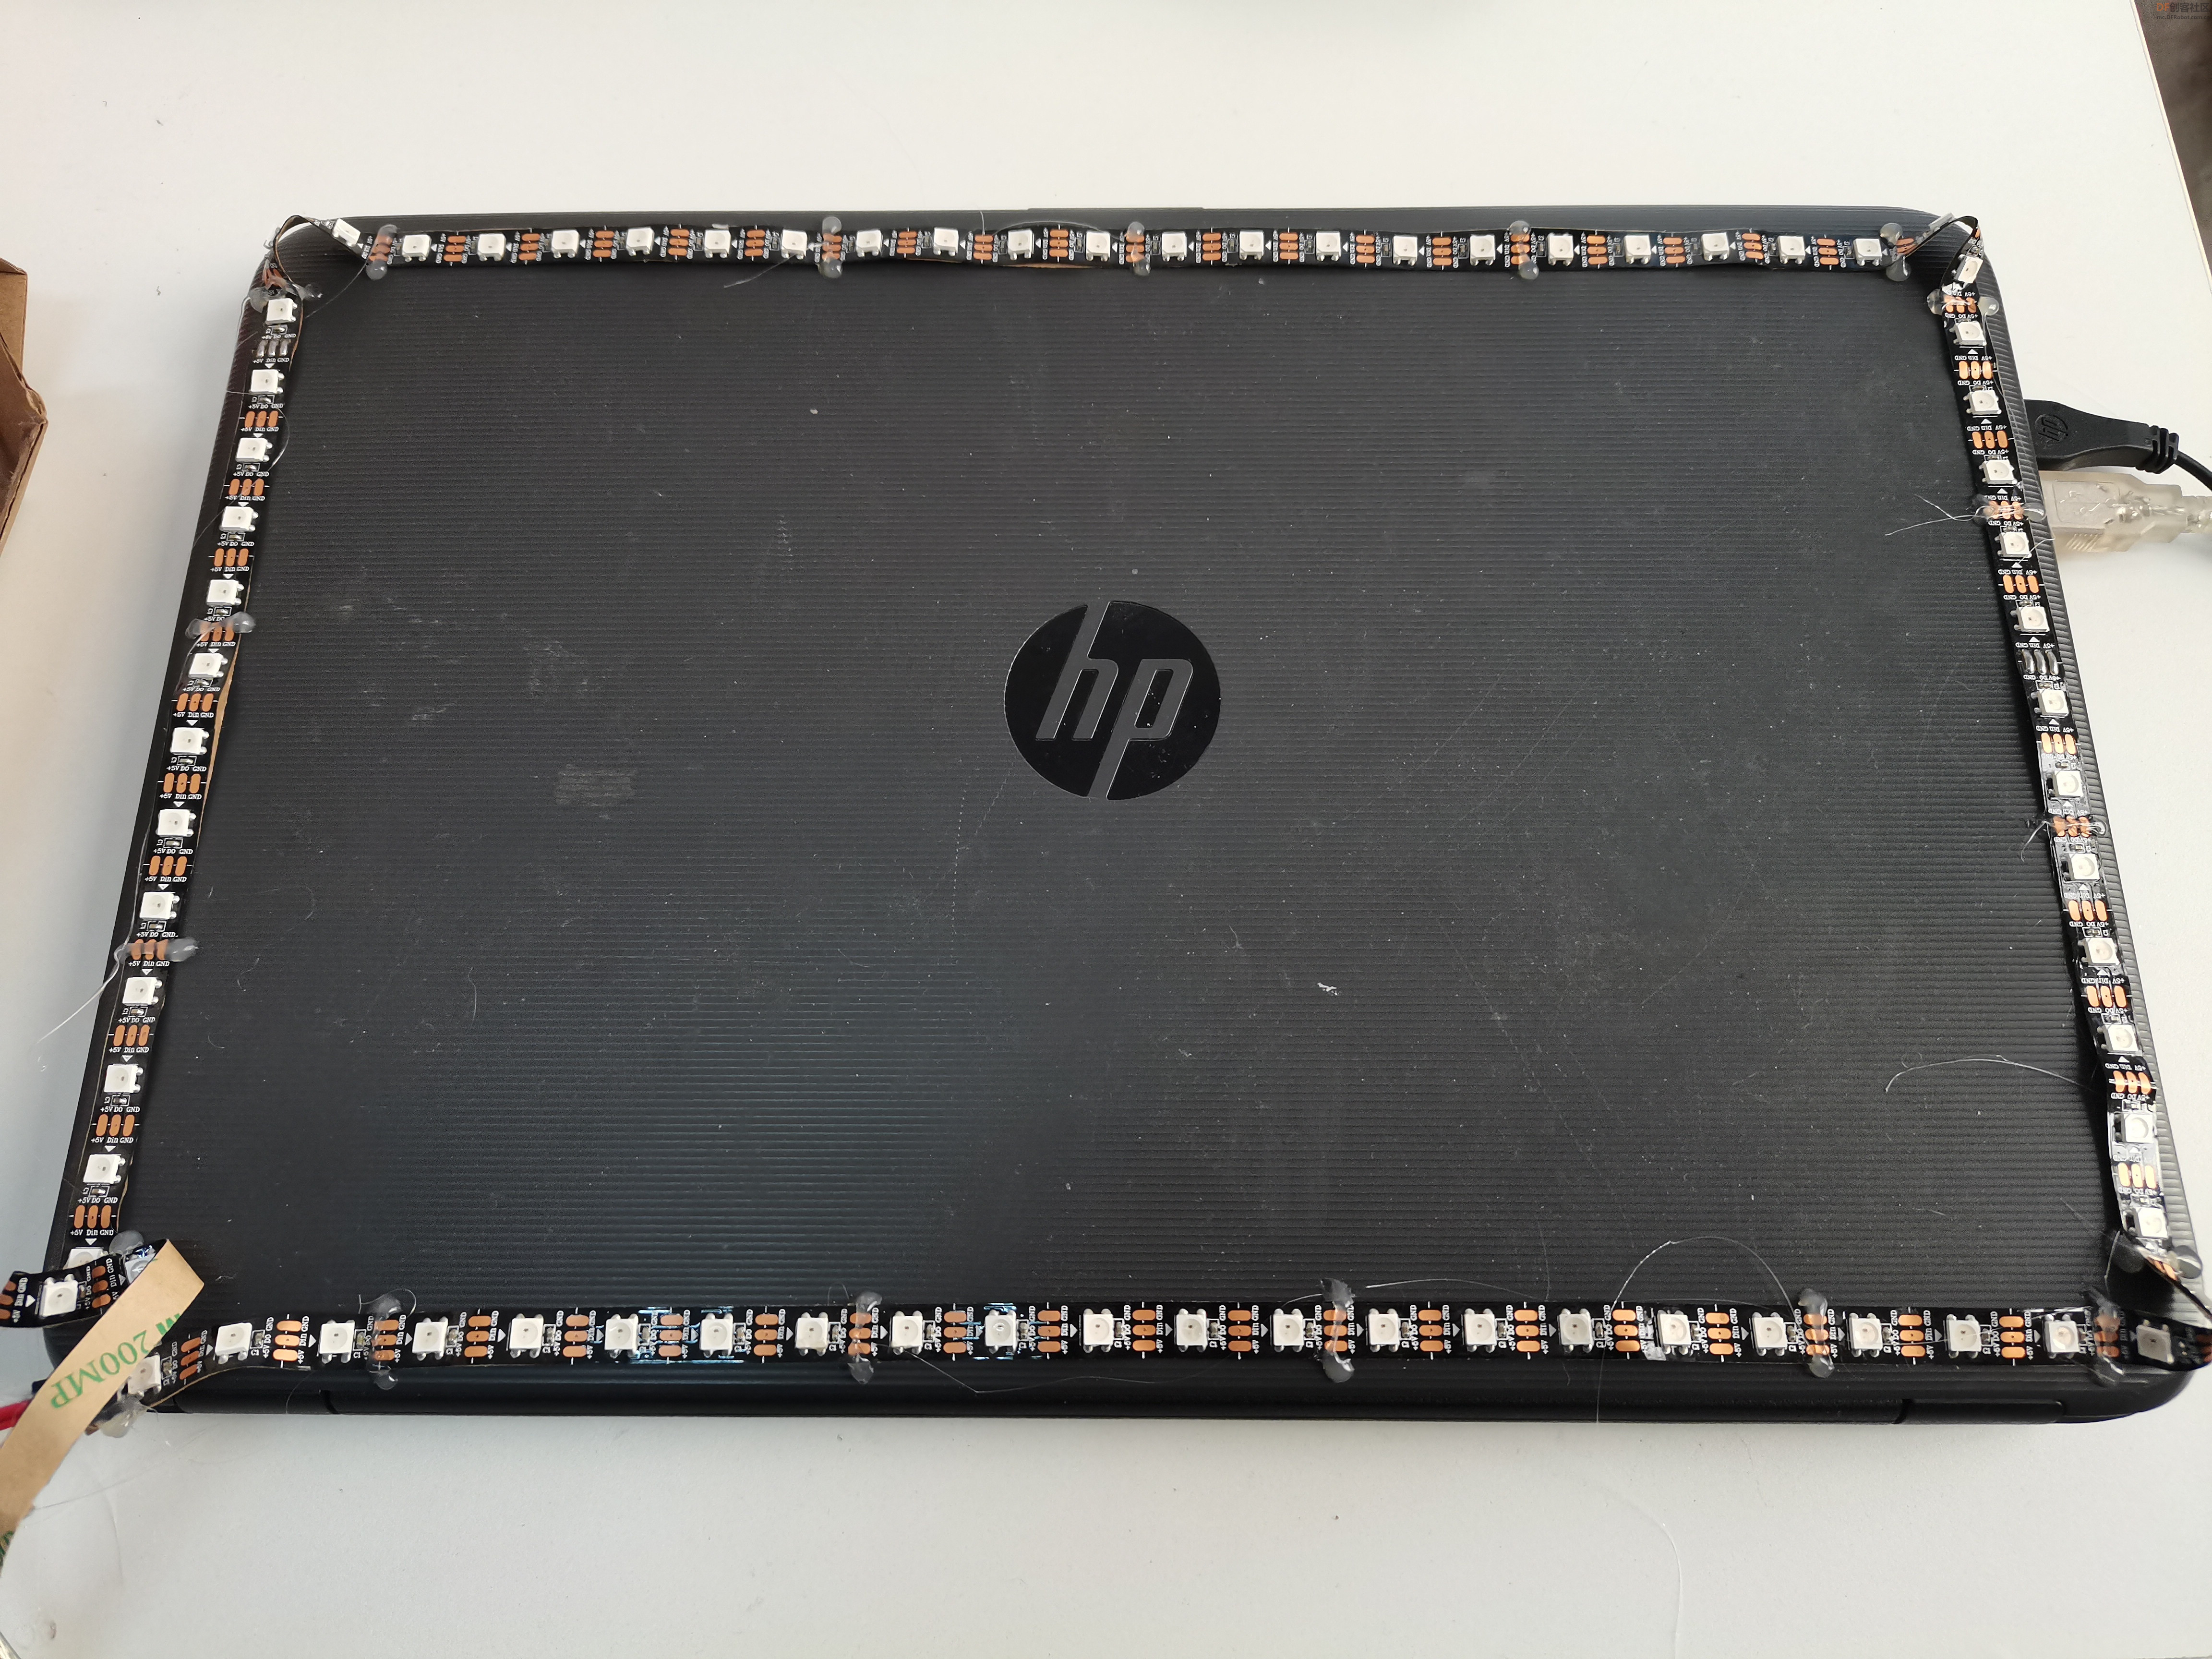
【硬件设计】
硬件使用DF Arduino uno,控制LED灯带。
【程序设计】
软件使用Mind+Python模式,通过“ctypes”库获取屏幕上某个坐标的颜色,再通过“Pinpong”库让Arduino控制LED灯带变幻相应颜色。(原创Python程序)
-
-
- from ctypes import * # 获取屏幕上某个坐标的颜色
- import time
- from pinpong.board import Board,Pin,NeoPixel
- import numpy as npy
- NEOPIXEL_PIN = Pin.D2
- PIXELS_NUM = 60 #灯数
- Board("uno").begin() #初始化,选择板型和端口号,不输入端口号则进行自动识别
- np = NeoPixel(Pin(NEOPIXEL_PIN), PIXELS_NUM)
-
- gdi32 = windll.gdi32
- user32 = windll.user32
- user32.SetProcessDPIAware()
- w, h= [user32.GetSystemMetrics(0), user32.GetSystemMetrics(1)]
- def get_color(x, y):
- hdc = user32.GetDC(None) # 获取颜色值
- pixel = gdi32.GetPixel(hdc, x, y) # 提取RGB值
- r = pixel & 0x0000ff
- g = (pixel & 0x00ff00) >> 8
- b = pixel >> 16
- return (int(r),int(g),int(b))
- success=True
- n0=13
- h0=int(h/n0)
- n1=22
- w1=int(w/n1)
- n2=14
- h2=int(h/n2)
-
- while success:
- #右侧
- data=[]
- for j in range(0,n0):
- t0=h0*j+int(h0/2)
- rgb1,rgb2,rgb3=get_color(w-20, t0)
- k=12-j
- np[k] =(rgb1,rgb2,rgb3)
- #顶灯
- data=[]
- for j in range(0,n1):
- t1=w1*j+int(w1/2)
- rgb1,rgb2,rgb3=get_color(t1, 20)
- k=34-j
- np[k] =(rgb1,rgb2,rgb3)
- #左侧
- for j in range(0,n2):
- t2=h2*j+int(h2/2)
- rgb1,rgb2,rgb3=get_color(20, t2)
- k=35+j
- np[k] =(rgb1,rgb2,rgb3)
-
-
-
由于电脑配置原因,只使用了屏幕上相应的一个点来控制一个灯的颜色,如果你的电脑配置高,可以使用以下程序(使用多个点取平均颜色)试一试。我自己的电脑运行缓慢,显示效果不好。
-
- from ctypes import * # 获取屏幕上某个坐标的颜色
- import time
- from pinpong.board import Board,Pin,NeoPixel
- import numpy as npy
- NEOPIXEL_PIN = Pin.D2
- PIXELS_NUM = 60 #灯数
- Board("uno").begin() #初始化,选择板型和端口号,不输入端口号则进行自动识别
- np = NeoPixel(Pin(NEOPIXEL_PIN), PIXELS_NUM)
-
- gdi32 = windll.gdi32
- user32 = windll.user32
- user32.SetProcessDPIAware()
- w, h= [user32.GetSystemMetrics(0), user32.GetSystemMetrics(1)]
- def get_color(x, y):
- hdc = user32.GetDC(None) # 获取颜色值
- pixel = gdi32.GetPixel(hdc, x, y) # 提取RGB值
- r = pixel & 0x0000ff
- g = (pixel & 0x00ff00) >> 8
- b = pixel >> 16
- return (int(r),int(g),int(b))
- success=True
- n0=13
- h0=int(h/n0)
- n1=22
- w1=int(w/n1)
- n2=14
- h2=int(h/n2)
- print(h)
- temp=[]
- while success:
- #右侧
- data=[]
- for j in range(0,n0):
- t0=h0*j+int(h0/2)-1
- tp=h0*j+int(h0/2)+1
- for m in range(t0,tp):
- rgb1,rgb2,rgb3=get_color(w-20, m)
- data.append((rgb1,rgb2,rgb3))
- temp=npy.mean(data,0)
- k=12-j
-
- np[k] =(int(temp[0]),int(temp[1]),int(temp[2]))
- #顶灯
- data=[]
- for j in range(0,n1):
- t1=w1*j+int(w1/2)-1
- tp=h0*j+int(h0/2)+1
- for m in range(t1,tp):
- rgb1,rgb2,rgb3=get_color(m, 20)
- data.append((rgb1,rgb2,rgb3))
- temp=npy.mean(data,0)
- k=34-j
- np[k] =(int(temp[0]),int(temp[1]),int(temp[2]))
- #左侧
- data=[]
- for j in range(0,n2):
- t2=h2*j+int(h2/2)-1
- tp=h0*j+int(h0/2)+1
- for m in range(t2,tp):
- rgb1,rgb2,rgb3=get_color(20, m)
- data.append((rgb1,rgb2,rgb3))
- temp=npy.mean(data,0)
- k=35+j
- np[k] =(int(temp[0]),int(temp[1]),int(temp[2]))
- print(1)
-
-
【演示视频】
|


 沪公网安备31011502402448
 置顶卡
置顶卡 变色卡
变色卡 千斤顶
千斤顶


 活跃会员
活跃会员
 宣传大使
宣传大使
 创客造
创客造
 编辑选择奖
编辑选择奖
 志“童”道合
 编辑选择奖
编辑选择奖
 编辑选择奖
编辑选择奖
 编辑选择奖
编辑选择奖