本文介绍在树莓派上使用Pyside2+QML方式进行GUI程序的开发,该GUI程序可以通过滑动条来控制树莓派的PWM输出,从而控制LED的亮度。开发环境依然使用之前介绍的PyCharm编写python代码和远程开发,然后使用QtCreator编写QML界面的方式。
1、新建项目
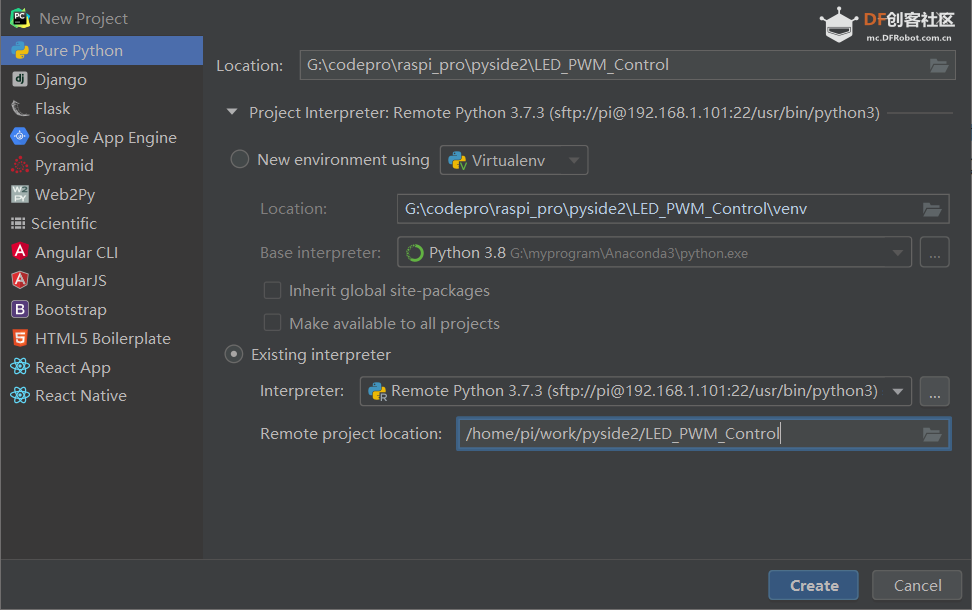
1.1、新建工程
打开PyCharm,新建工程LED_PWM_Control,如下:
1.2、添加python主程序代码
上面代码中 setOverrideCursor 用于隐藏鼠标。
class Controler(QObject):

    led = PWMLED(26)

    def __init__(self):
        super().__init__()

    @Slot()
    def exit(self):
        sys.exit()

    @Slot(int)
    def changeLEDPWM(self,value):
        print("set led pwm:", value)
        self.led.value = value/100.00
这个类包含两个功能,即退出程序和改变引脚PWM用于控制LED的亮度。
-
然后将这个类注册到QML,这样可以再qml控件中使用控制类的槽函数:
controler = Controler()
context = engine.rootContext()
context.setContextProperty("_Controler", controler)
1.3、添加界面文件
在工程文件夹右键新建文件,如下:
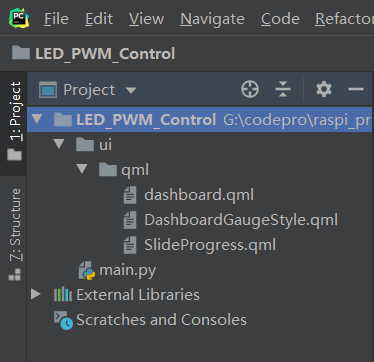
- 包含主界面文件 dashboard.qml
- 仪表盘控件的样式自定义 DashboardGaugeStyle文件
- 滑动条自定义控件 SlideProgress
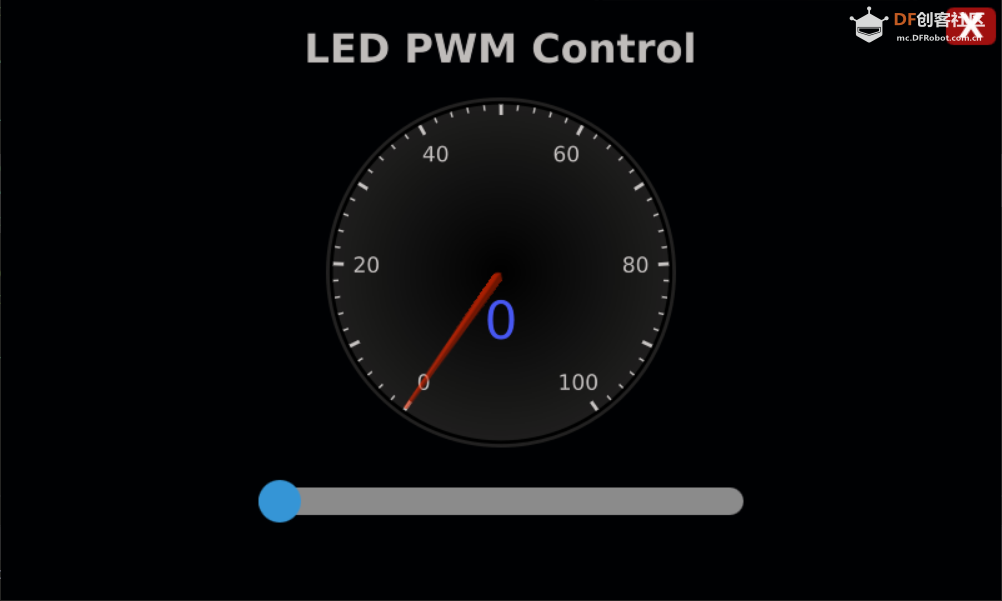
主界面实现功能为:滑动条滑动时候改变PWM值,然后仪表盘显示PWM值。
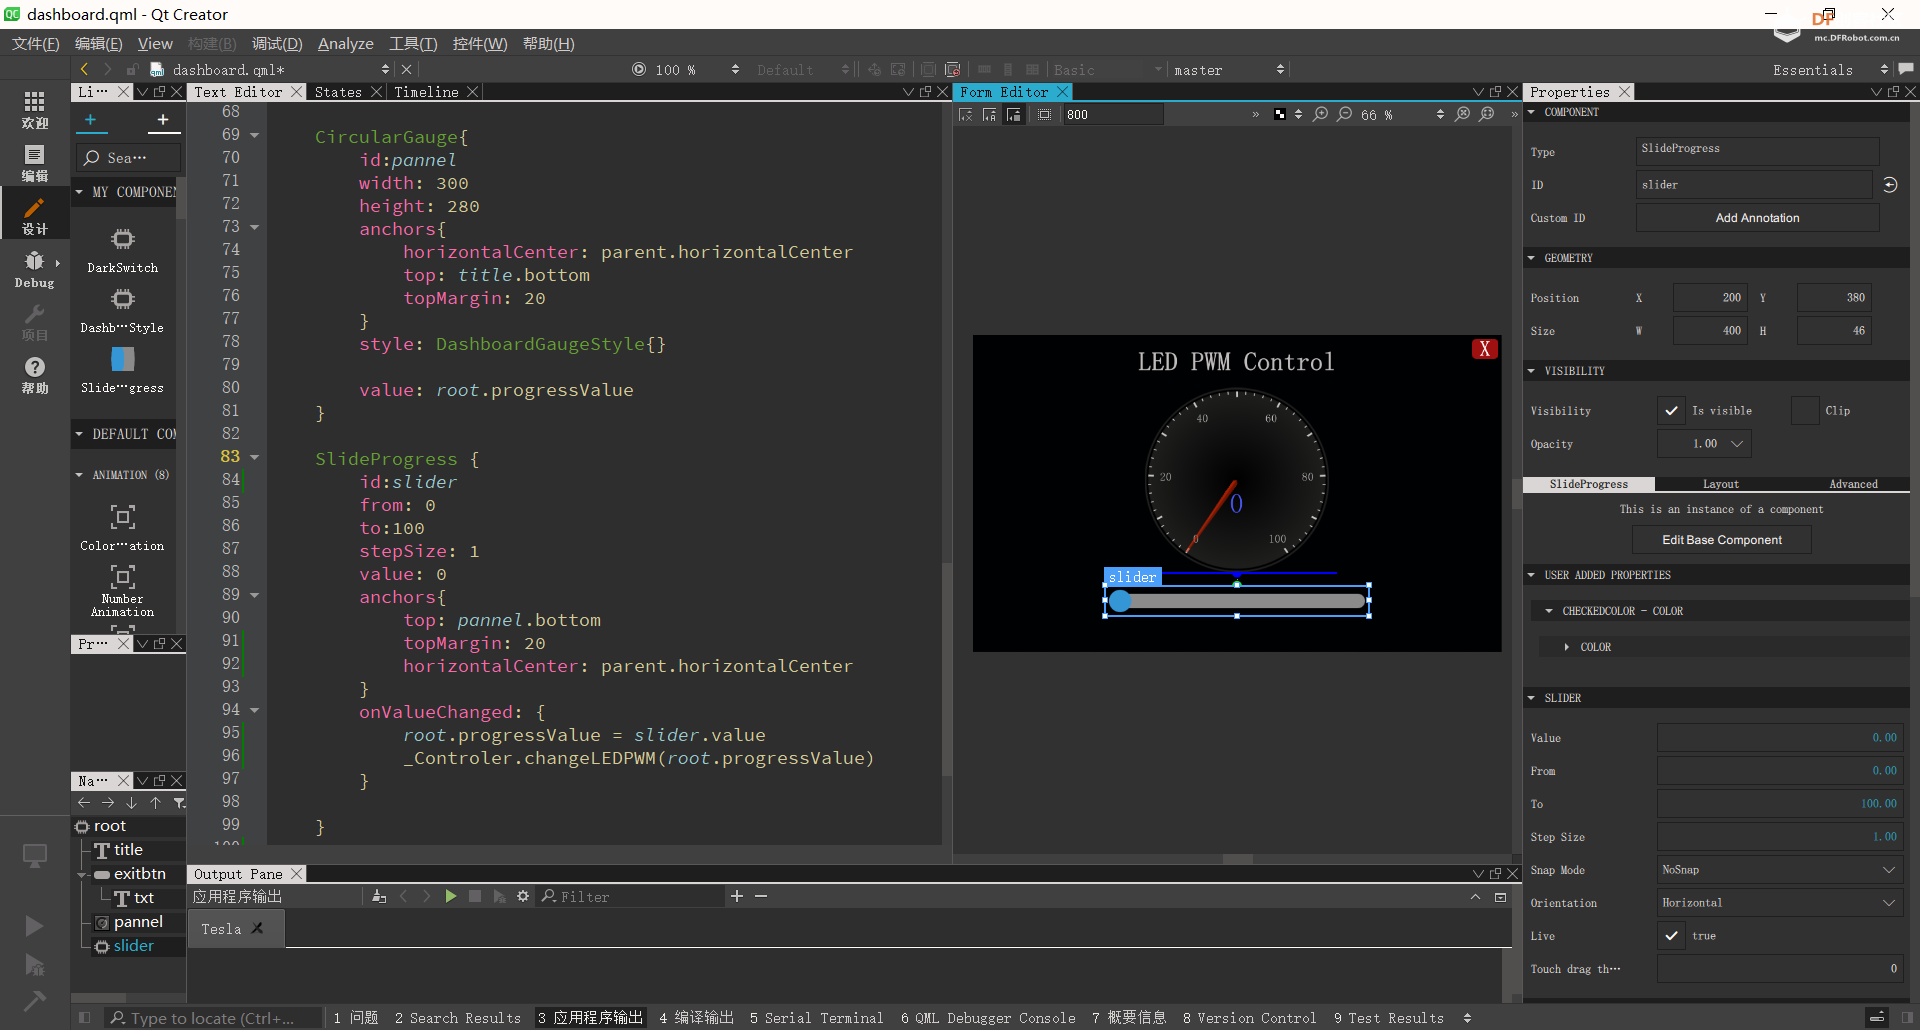
2、编写界面
首先界面设置为全屏,包含一个表盘控件和一个滑动条,用于调节PWM以控制LED亮度,右上角为一个按钮用于退出程序,界面用QtCreator编写:
import QtQuick 2.11
import QtQuick.Window 2.4
import QtQuick.Controls 2.4
import QtQuick.Controls.Styles 1.4
import QtQuick.Extras 1.4
import QtGraphicalEffects 1.0

ApplicationWindow{
    id:root
    width: 800
    height: 480
    visible: true
    color: "#000103"
    visibility: Window.FullScreen

    property int  progressValue: 0

    Text {
        id: title
        text: qsTr("LED PWM Control")
        color: "#BFBFBF"
        font{
            pointSize: 24
            bold: true

        }
        anchors{
            horizontalCenter: parent.horizontalCenter
            top: parent.top
            topMargin: 20
        }
    }

    Button{
        id:exitbtn
        anchors{
            top:parent.top
            right: parent.right
            topMargin: 6
            rightMargin: 4
        }
        width: 40
        height: 30
        background: Rectangle{
            anchors.fill: parent
            color: "#a01010"
            radius: 6
        }
        Text {
            id: txt
            text: qsTr("X")
            anchors{
                centerIn: parent
            }
            font{
                pointSize: 20
                bold: true
            }
            color: "white"
        }

        onClicked: {
            console.log("exit")
            _Controler.exit()
        }
    }

    CircularGauge{
        id:pannel
        width: 300
        height: 280
        anchors{
            horizontalCenter: parent.horizontalCenter
            top: title.bottom
            topMargin: 20
        }
        style: DashboardGaugeStyle{}

        value: root.progressValue
    }

    SlideProgress {
        id:slider
        from: 0
        to:100
        stepSize: 1
        value: 0
        anchors{
            top: pannel.bottom
            topMargin: 20
            horizontalCenter: parent.horizontalCenter
        }
        onValueChanged: {
            root.progressValue = slider.value
            _Controler.changeLEDPWM(root.progressValue)
        }

    }

}

/*##^##
Designer {
    D{i:0;height:480;width:800}
}
##^##*/
其中CircularGauge和SlideProgress使用了自定义样式,用于美化效果。
3、执行测试
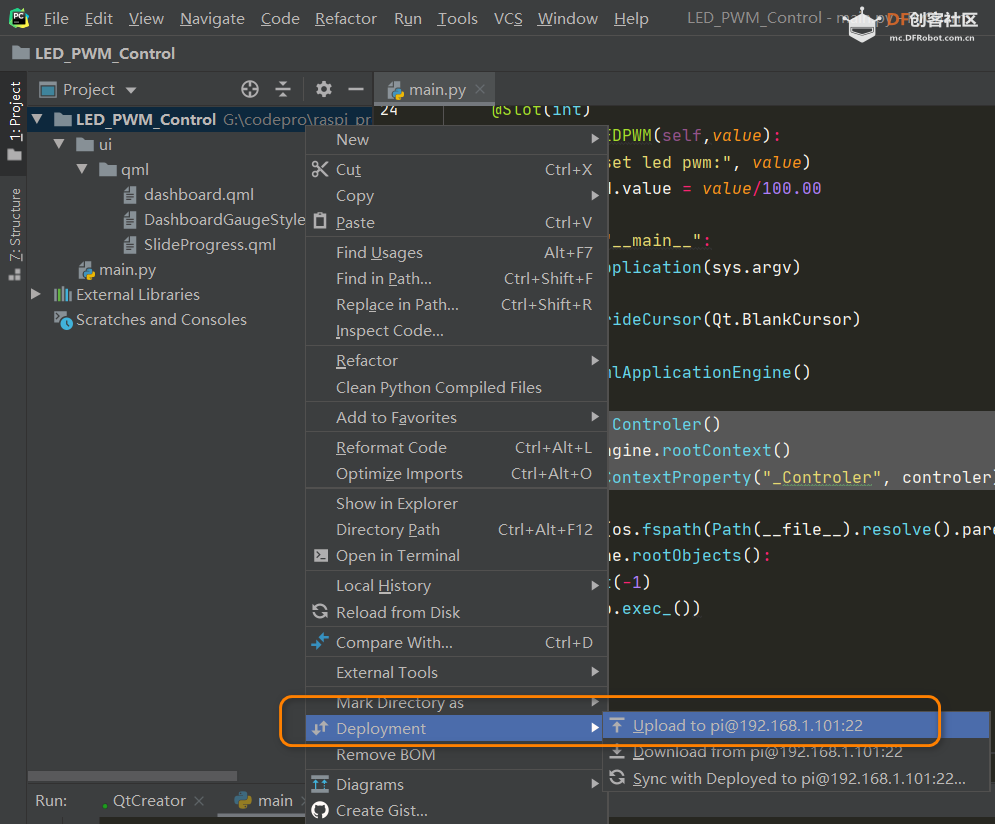
python3 main.py
| 

 沪公网安备31011502402448

 置顶卡
置顶卡 变色卡
变色卡 千斤顶
千斤顶